DISCLAIMER: This post reflects myself and only myself in its entirety. It is in no way related to or sponsored by my employer or anyone else. On February 3, 2023, I had reached out to Hughes in attempt to properly disclose these findings. Over the course of 6 months, we were trying to find a way for both sides to do this safely. As of August 30, 2023, I have received no further responses from Hughes' security team. I've attempted to contact them 3 times since but have not gotten a response.
HughesNet is a USA-based satellite internet provider. As of writing, they are on their 5th generation of satellite technology and issue customers the HT2000W satellite modem as part of their "VSAT" package. For those who don't know, VSAT stands for "Very Small Aperture Terminal", which effectively means a "small", two-way antenna. This is a bit of a unique piece of hardware, given that it ties together a satellite modem and a wireless router into one package. Unfortunately, there's next to no information on this device outside of the FCCID docs, and the pictures are so blurry and useless. #challengeaccepted Before we get started, I should note that this firmware appears to be at least a couple years old, so their security posture may have changed significantly. Anyways, let's crack this bad boy open!
Spoiler: Opening the case has been the biggest challenge thus far.
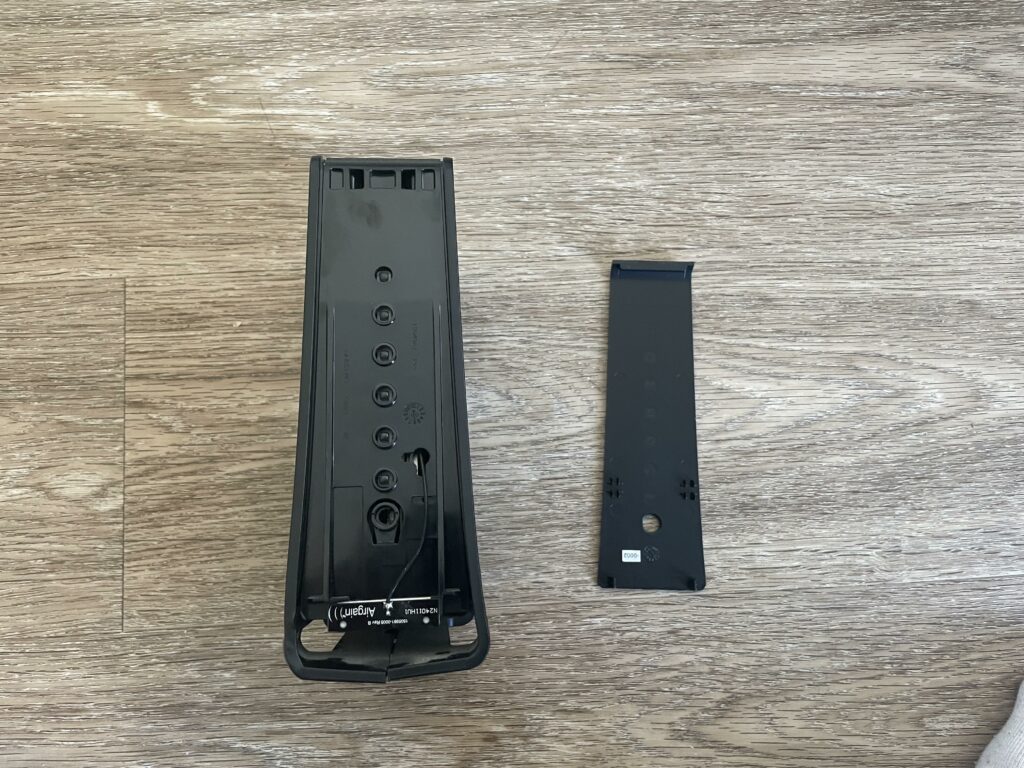
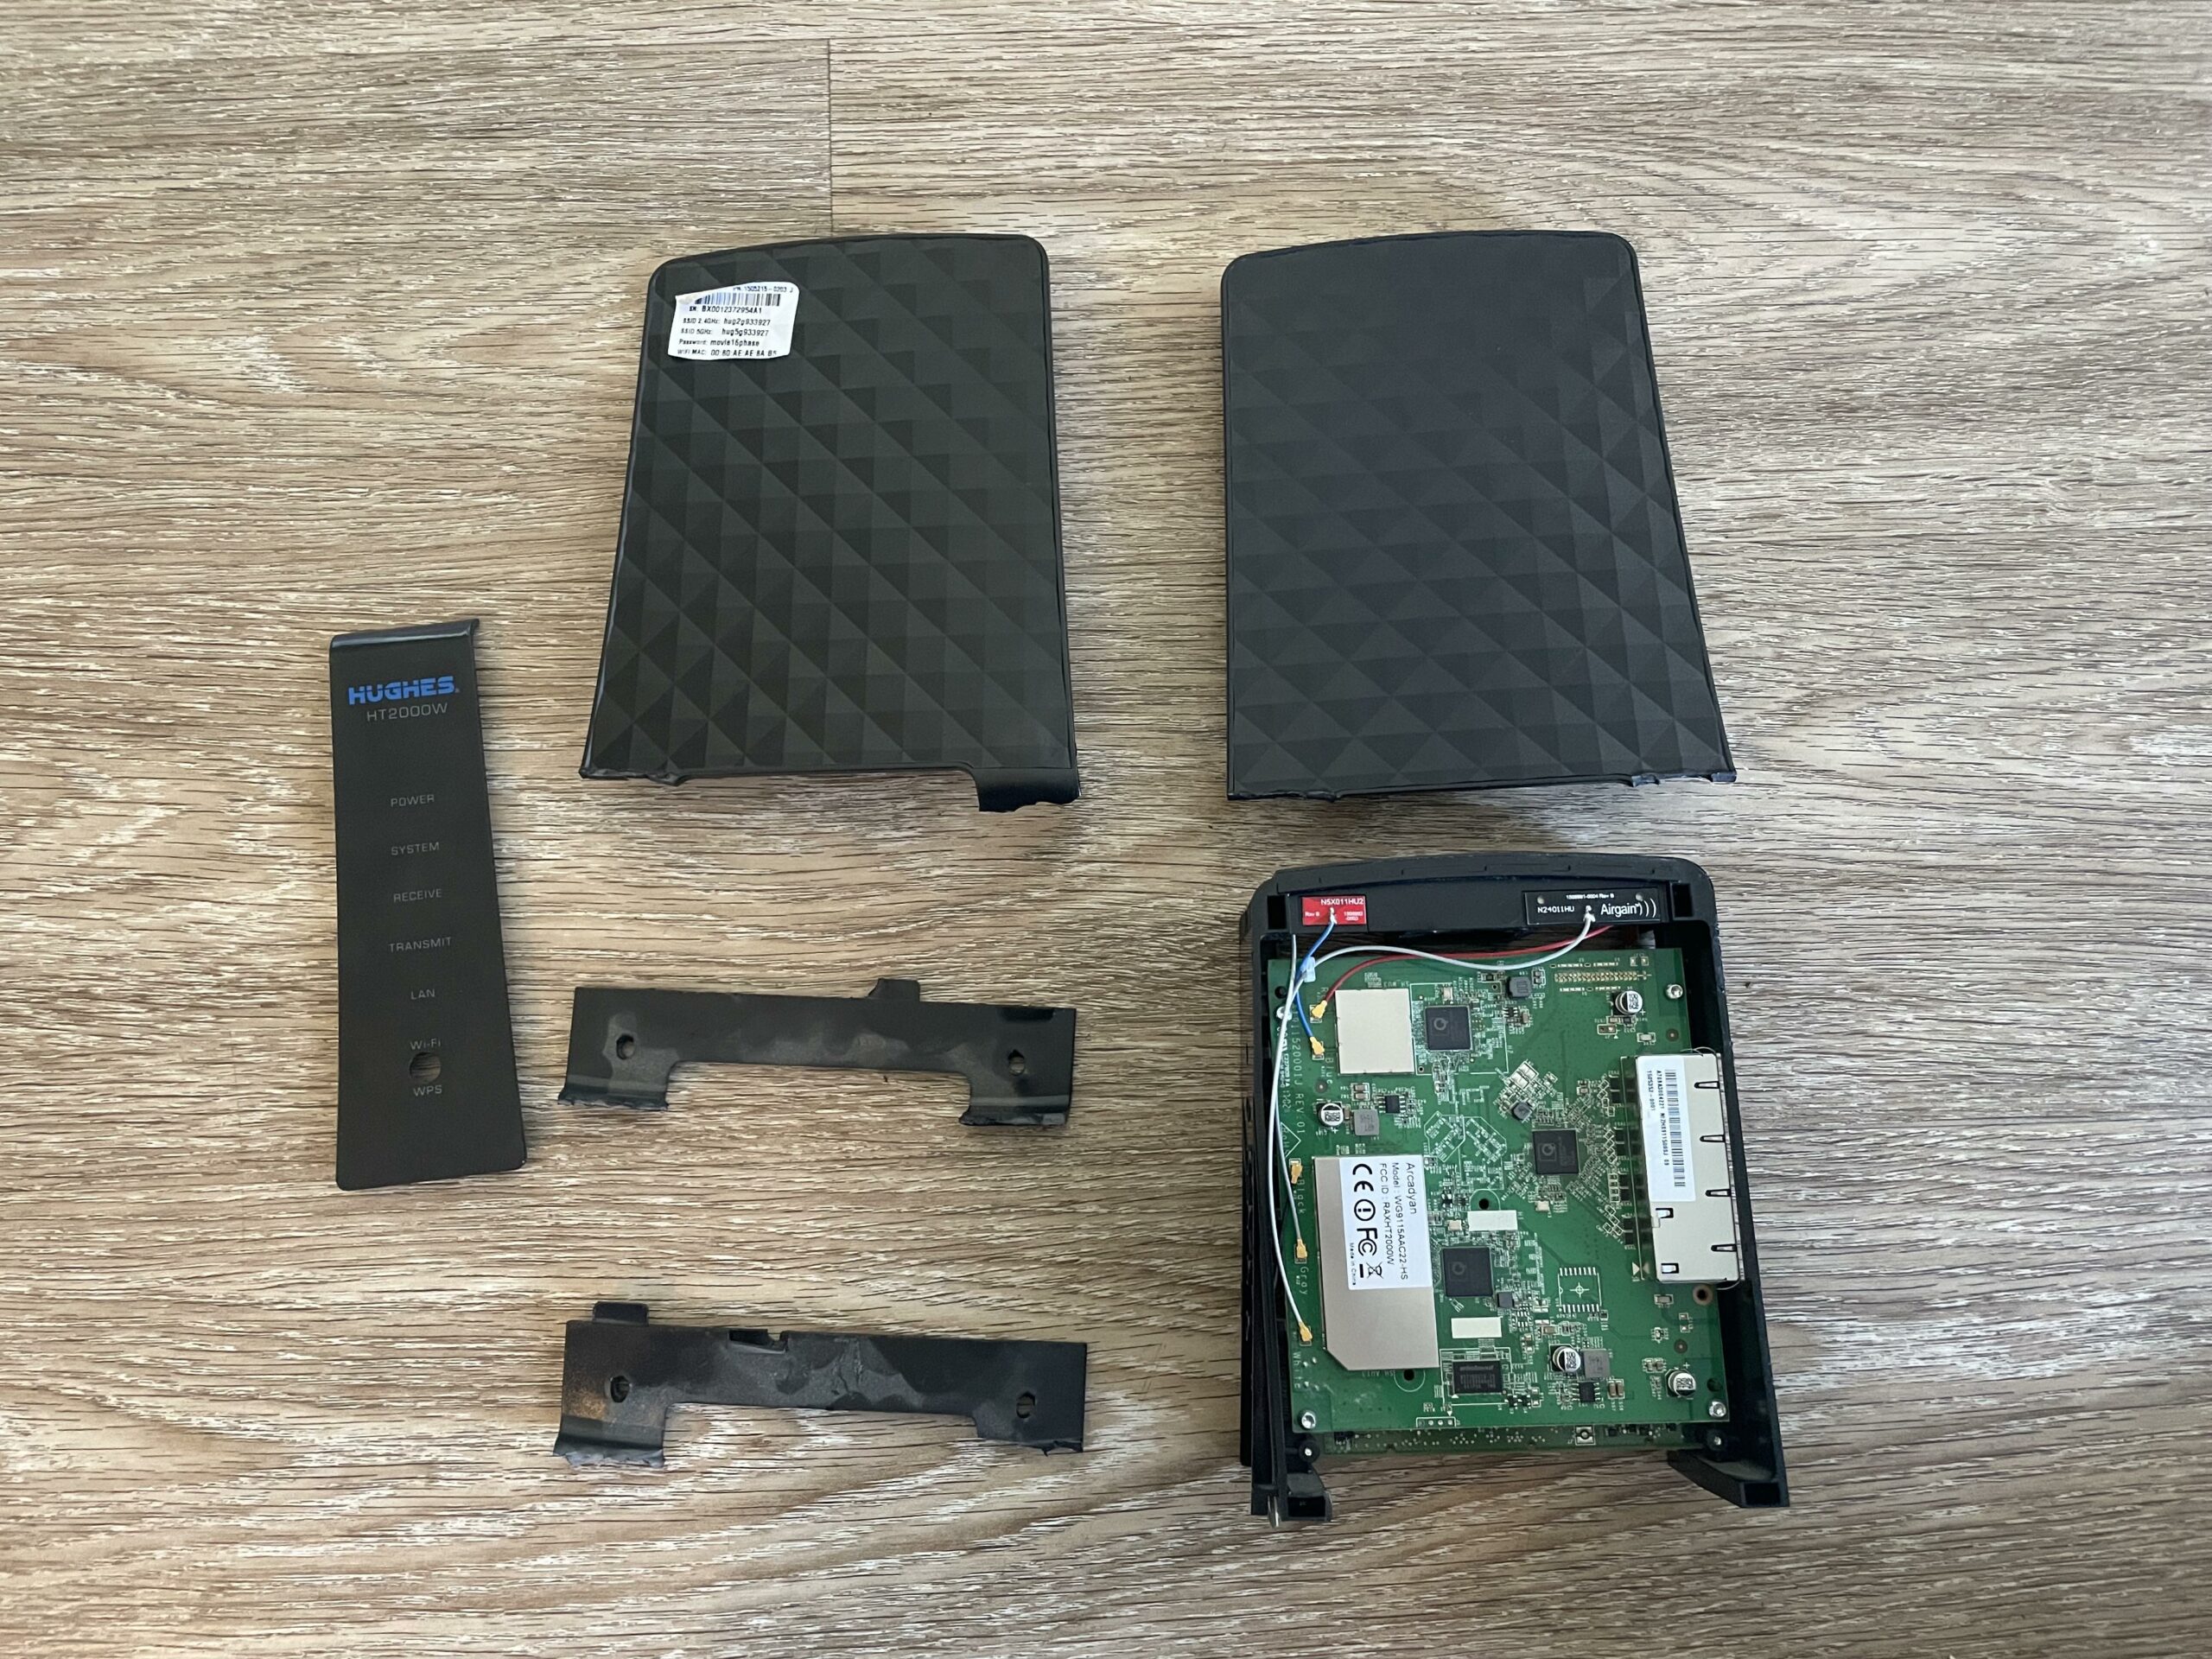
Let's start by taking off the front panel. This just pops off its little clips, easy. You'll find a 5GHz Airgain antenna attached to the front of the modem, followed by 4 more spread throughout the chassis. There are 3 5GHz antenna and 2 2.4GHz antenna. Presumably, this would be a class AC1600 router, however the 5GHz radio only supports 2 spatial streams, making this really a class AC1200 router.
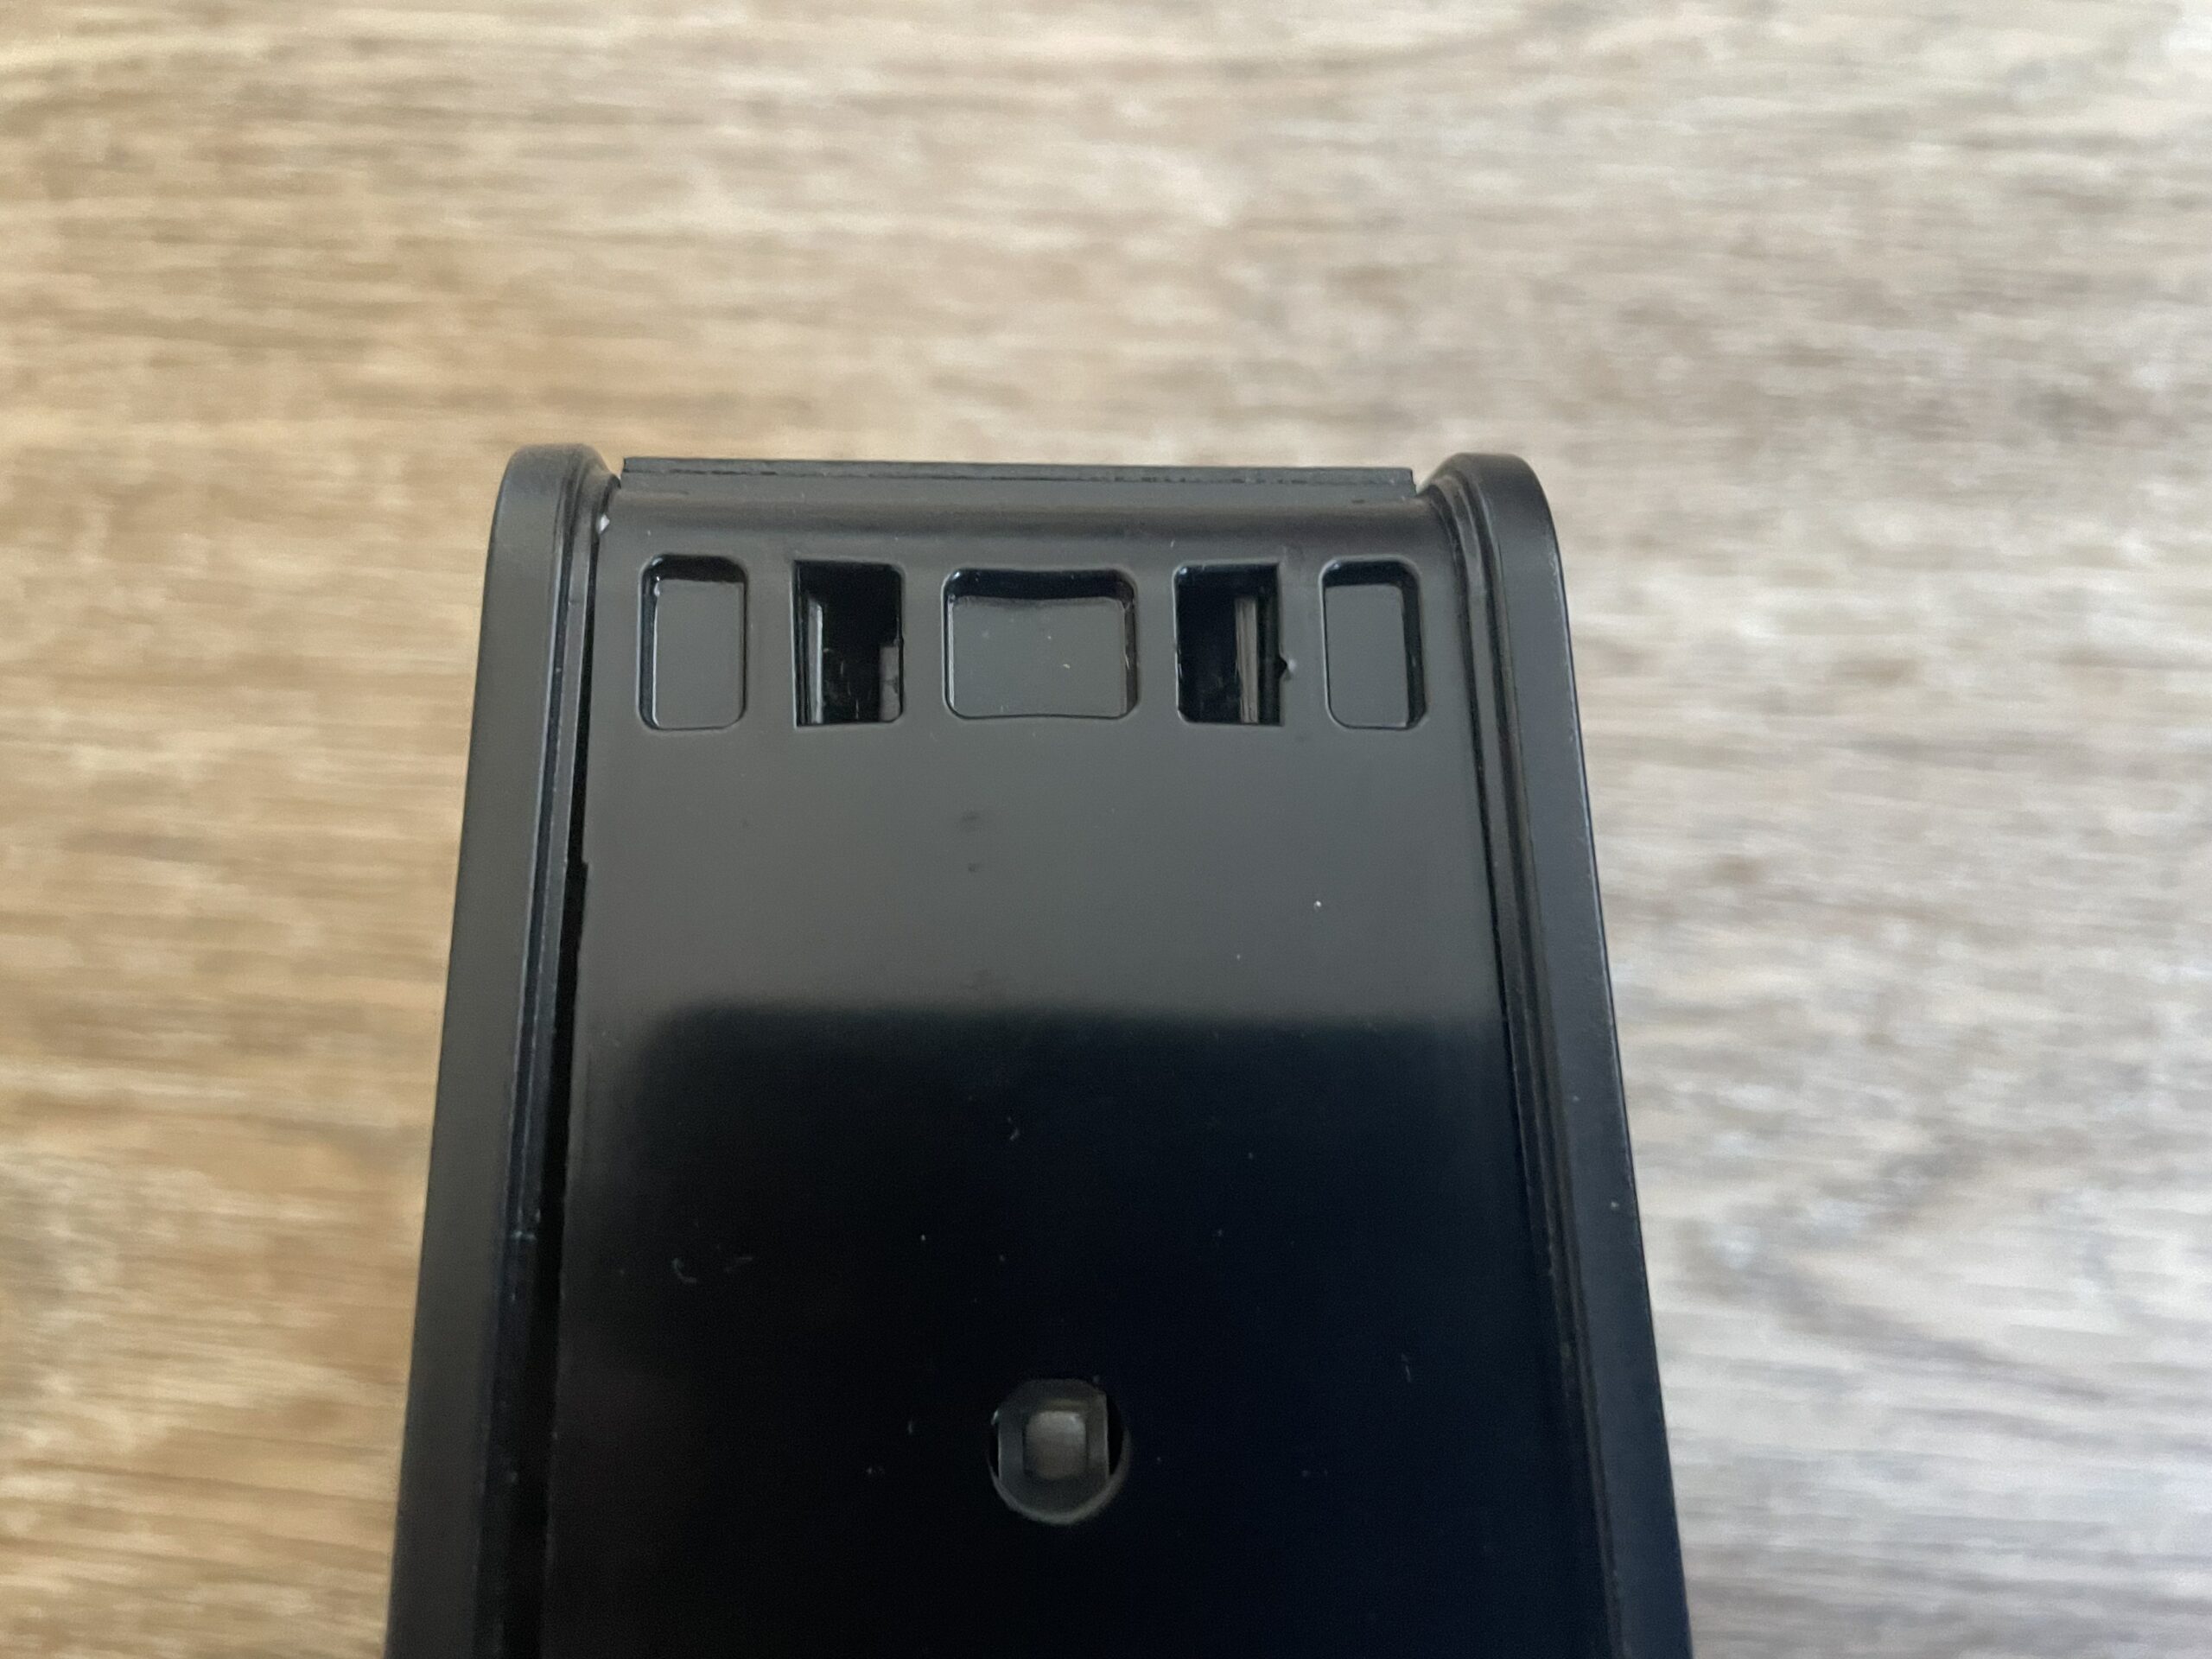
Now, it would appear that whoever services these modems has a special tool as getting the rest apart was insanely annoying. Let's start from the bottom. I ended up breaking off the feet to get to the little clips.
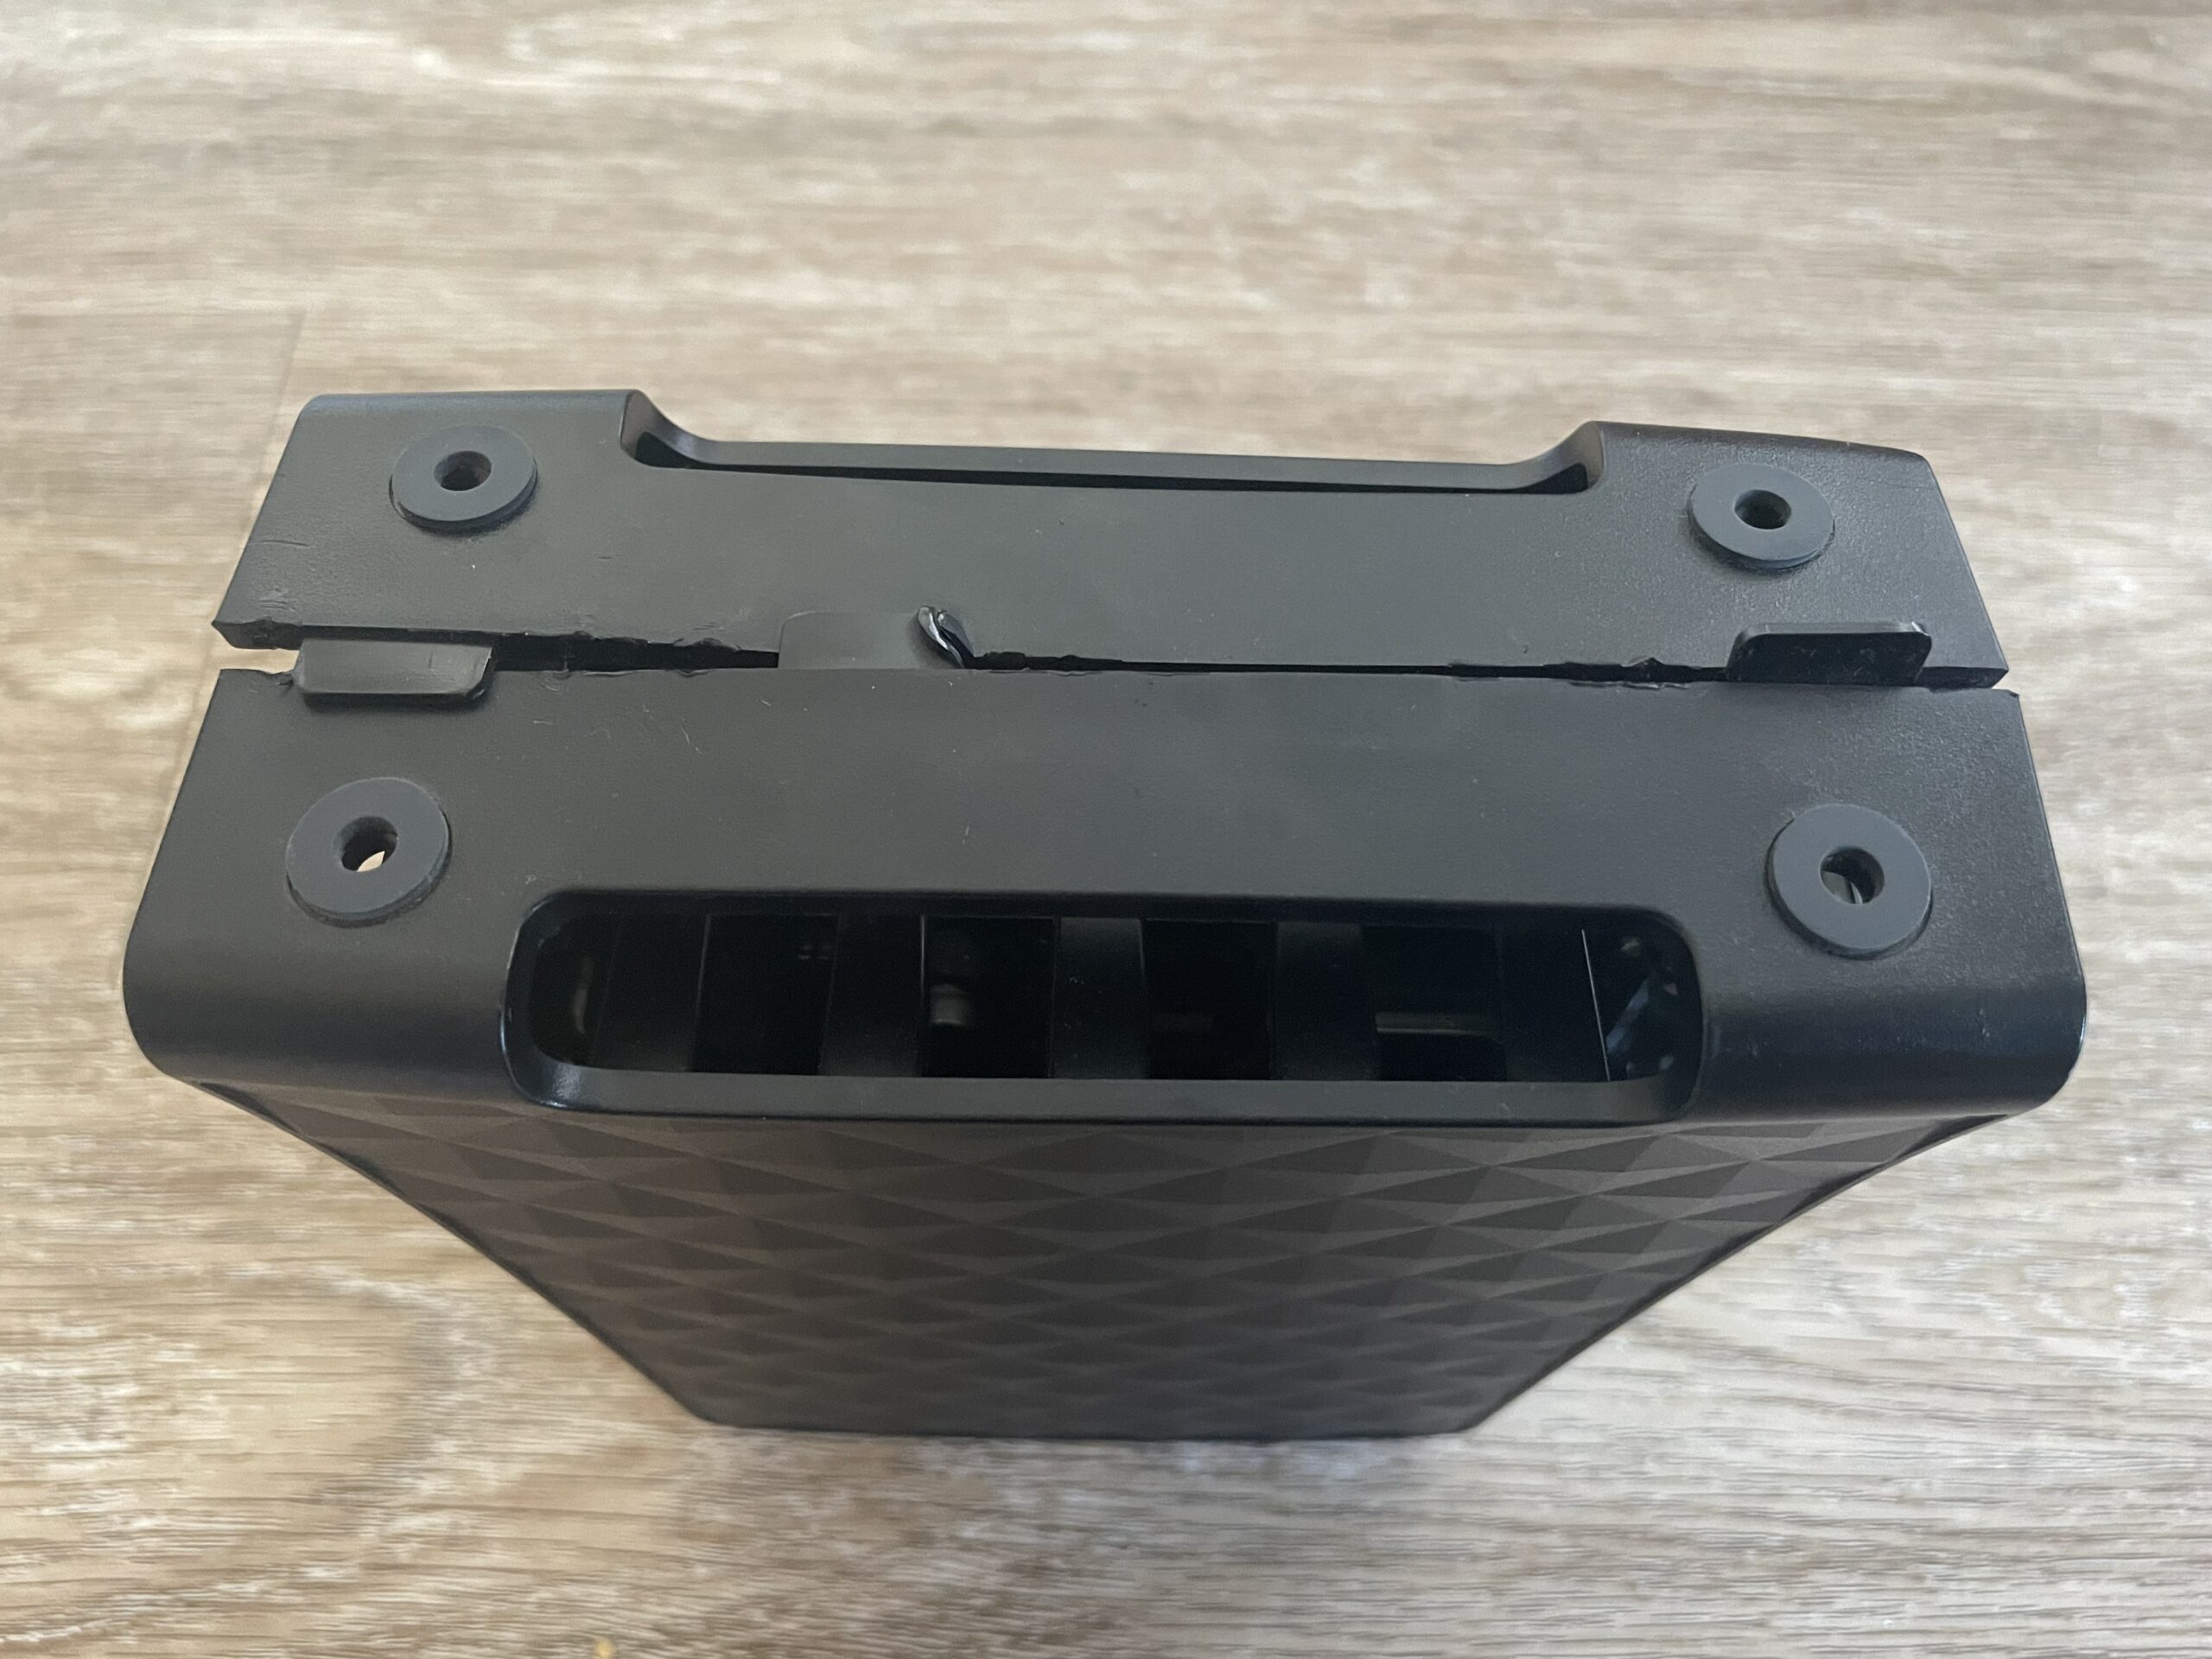 |  |  |
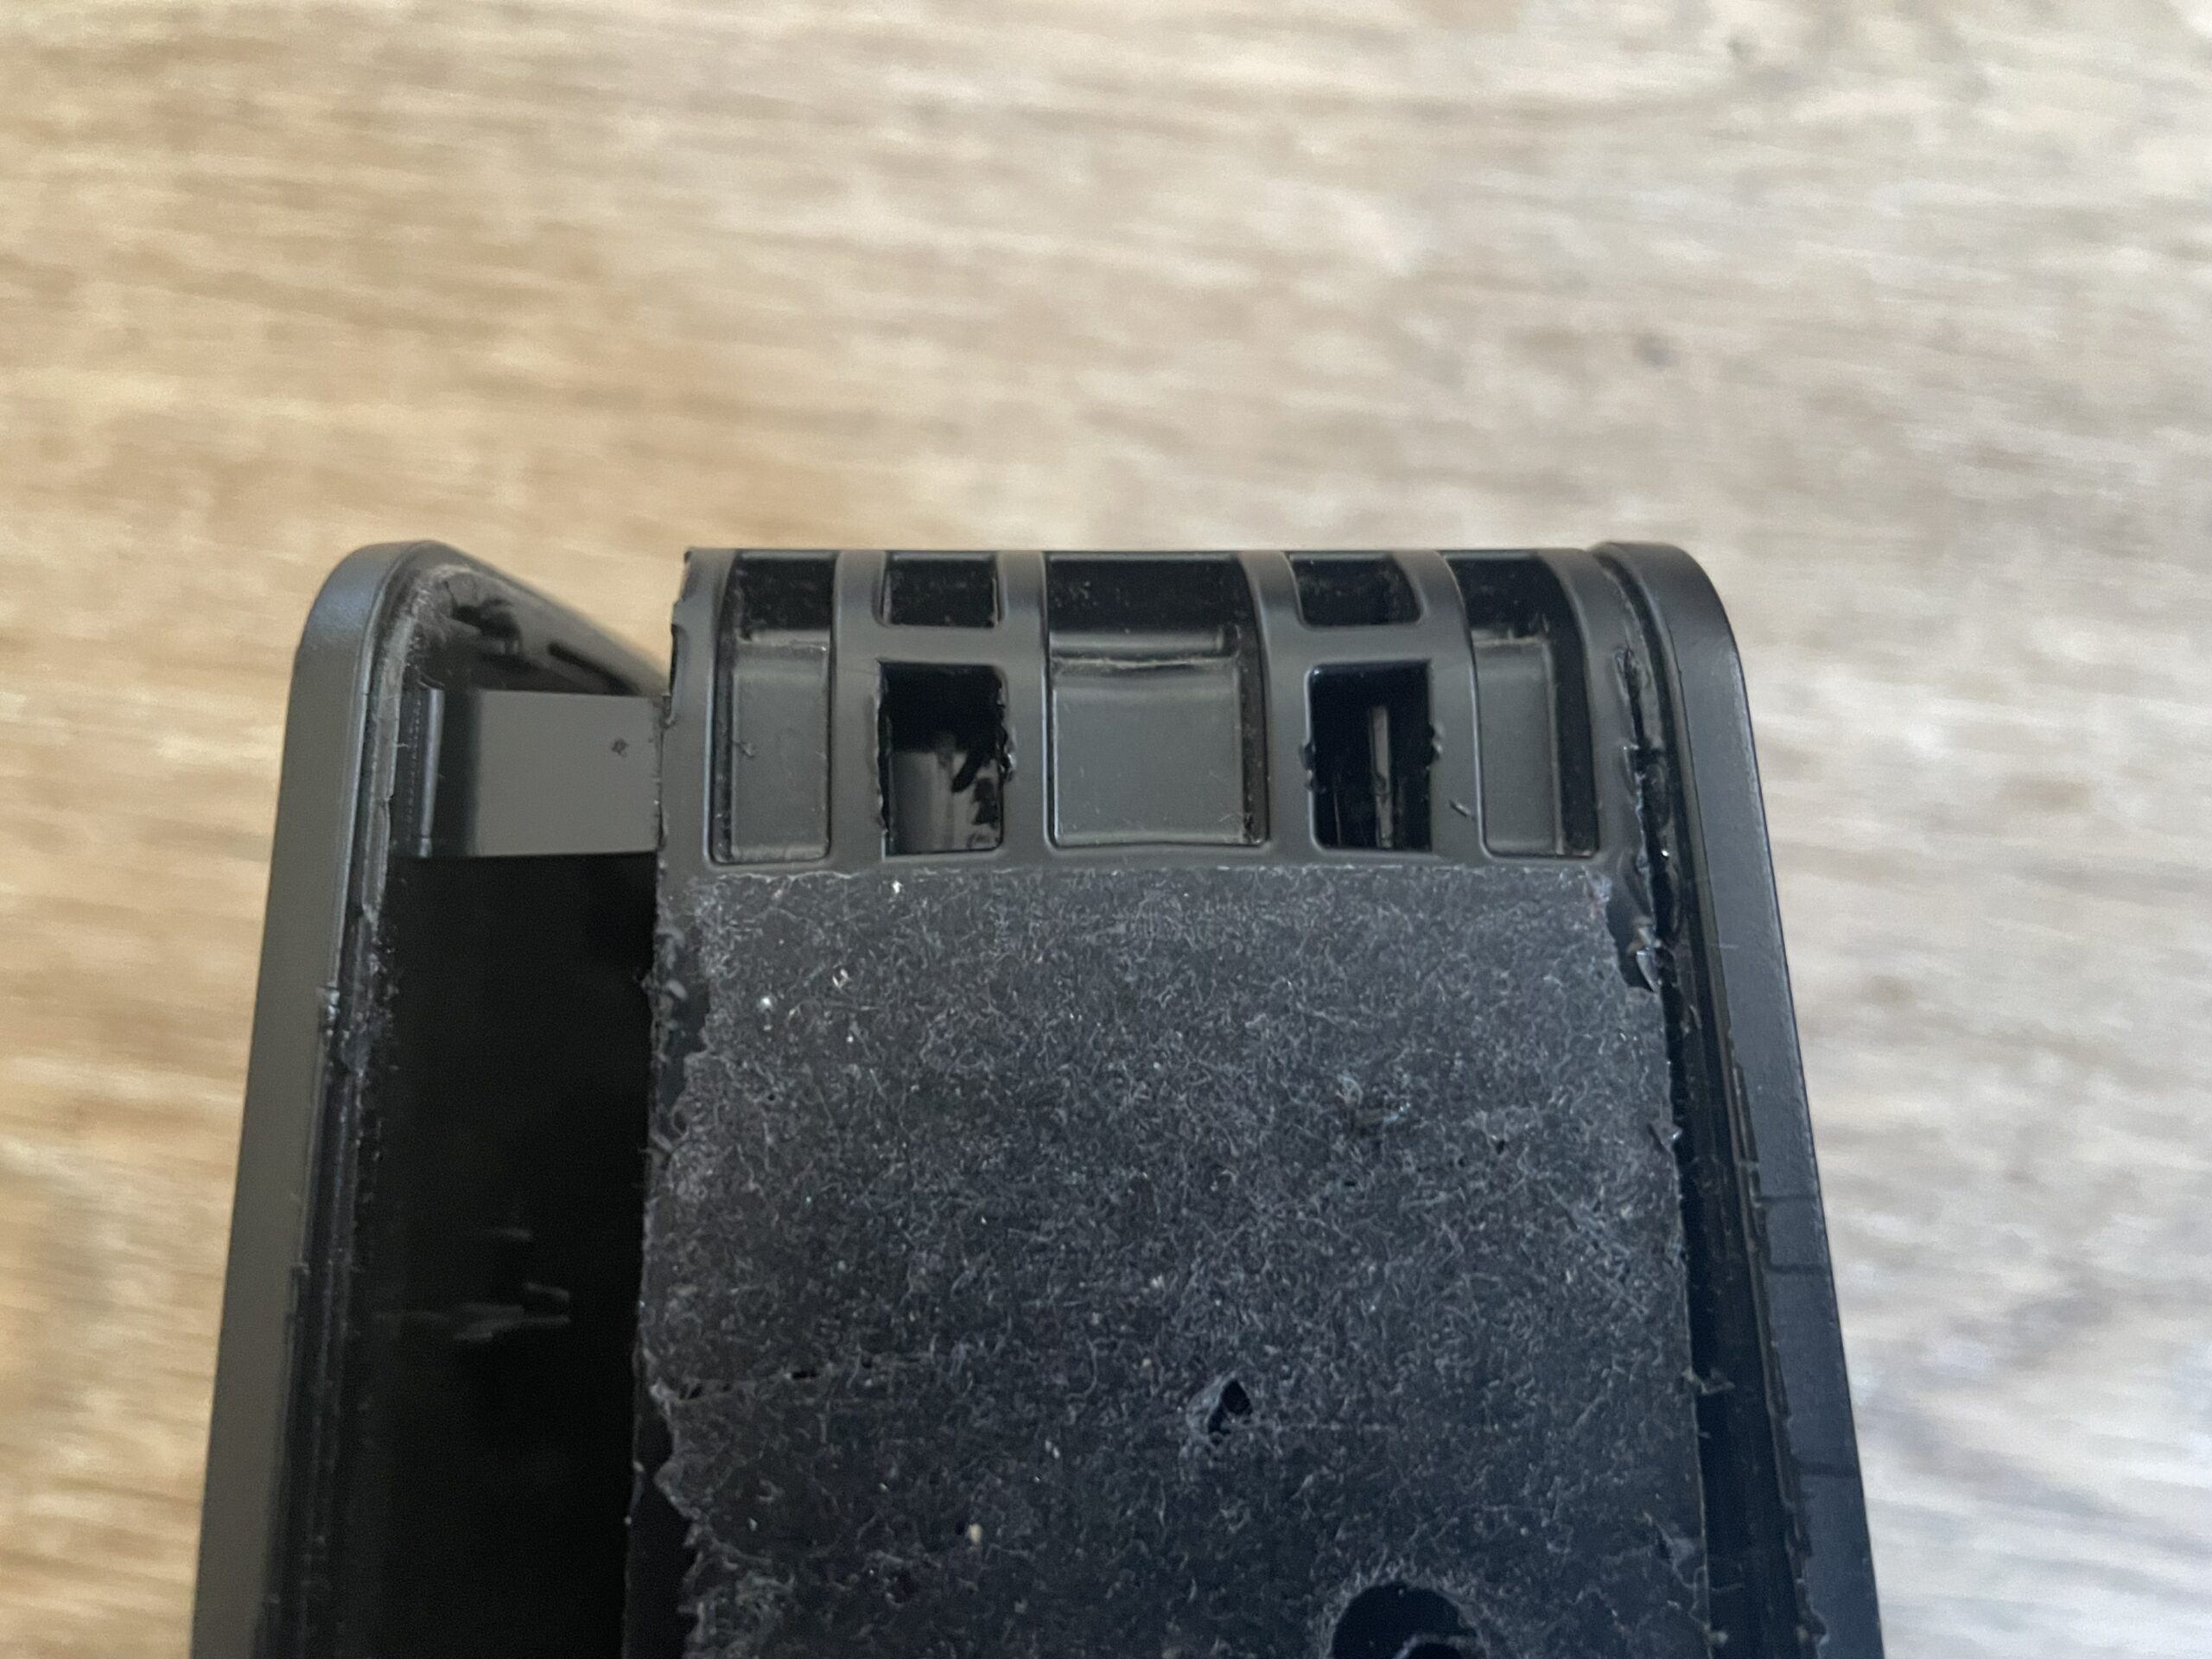
Directly below each of those 4 circles are little clips. They're really difficult to push in and unlock the side of the case, so I basically ended up just breaking the clips with a flathead screwdriver. I did say this was the hard part!
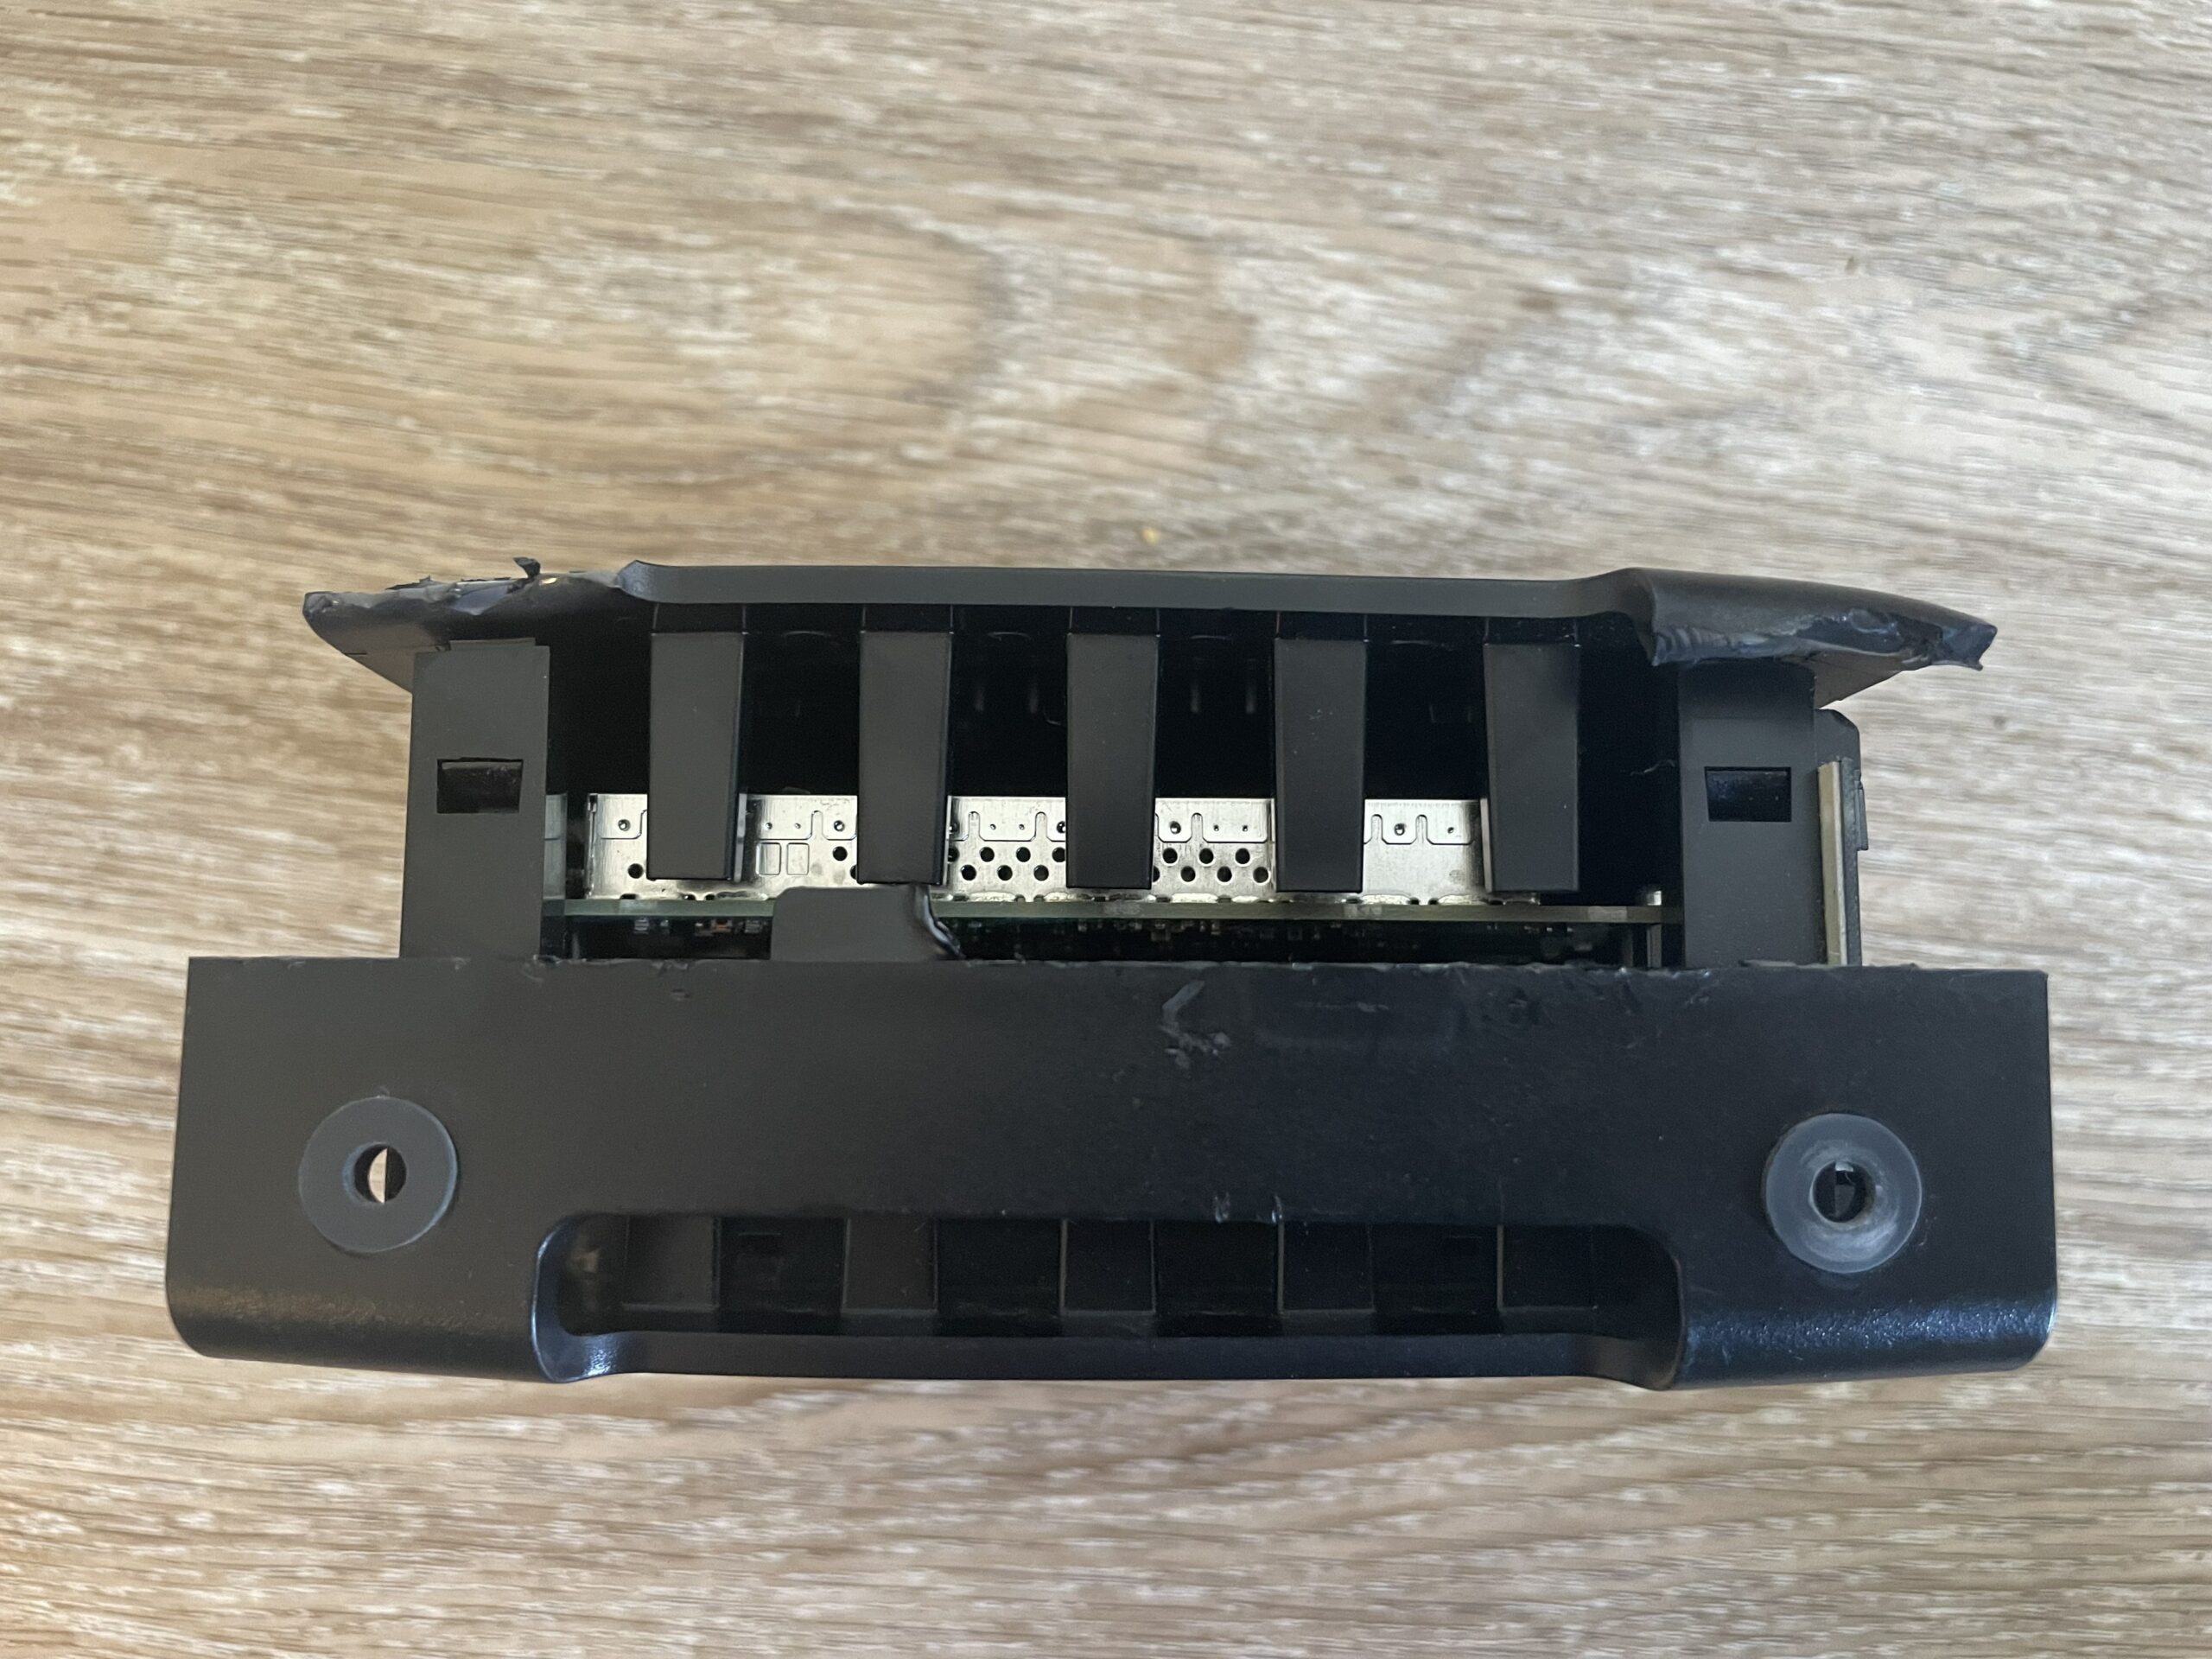
On the front and the back of the top part of the modem, there are 4 more of the same clips. Again, I pushed this with a flathead screwdriver until it opened.
 |  |
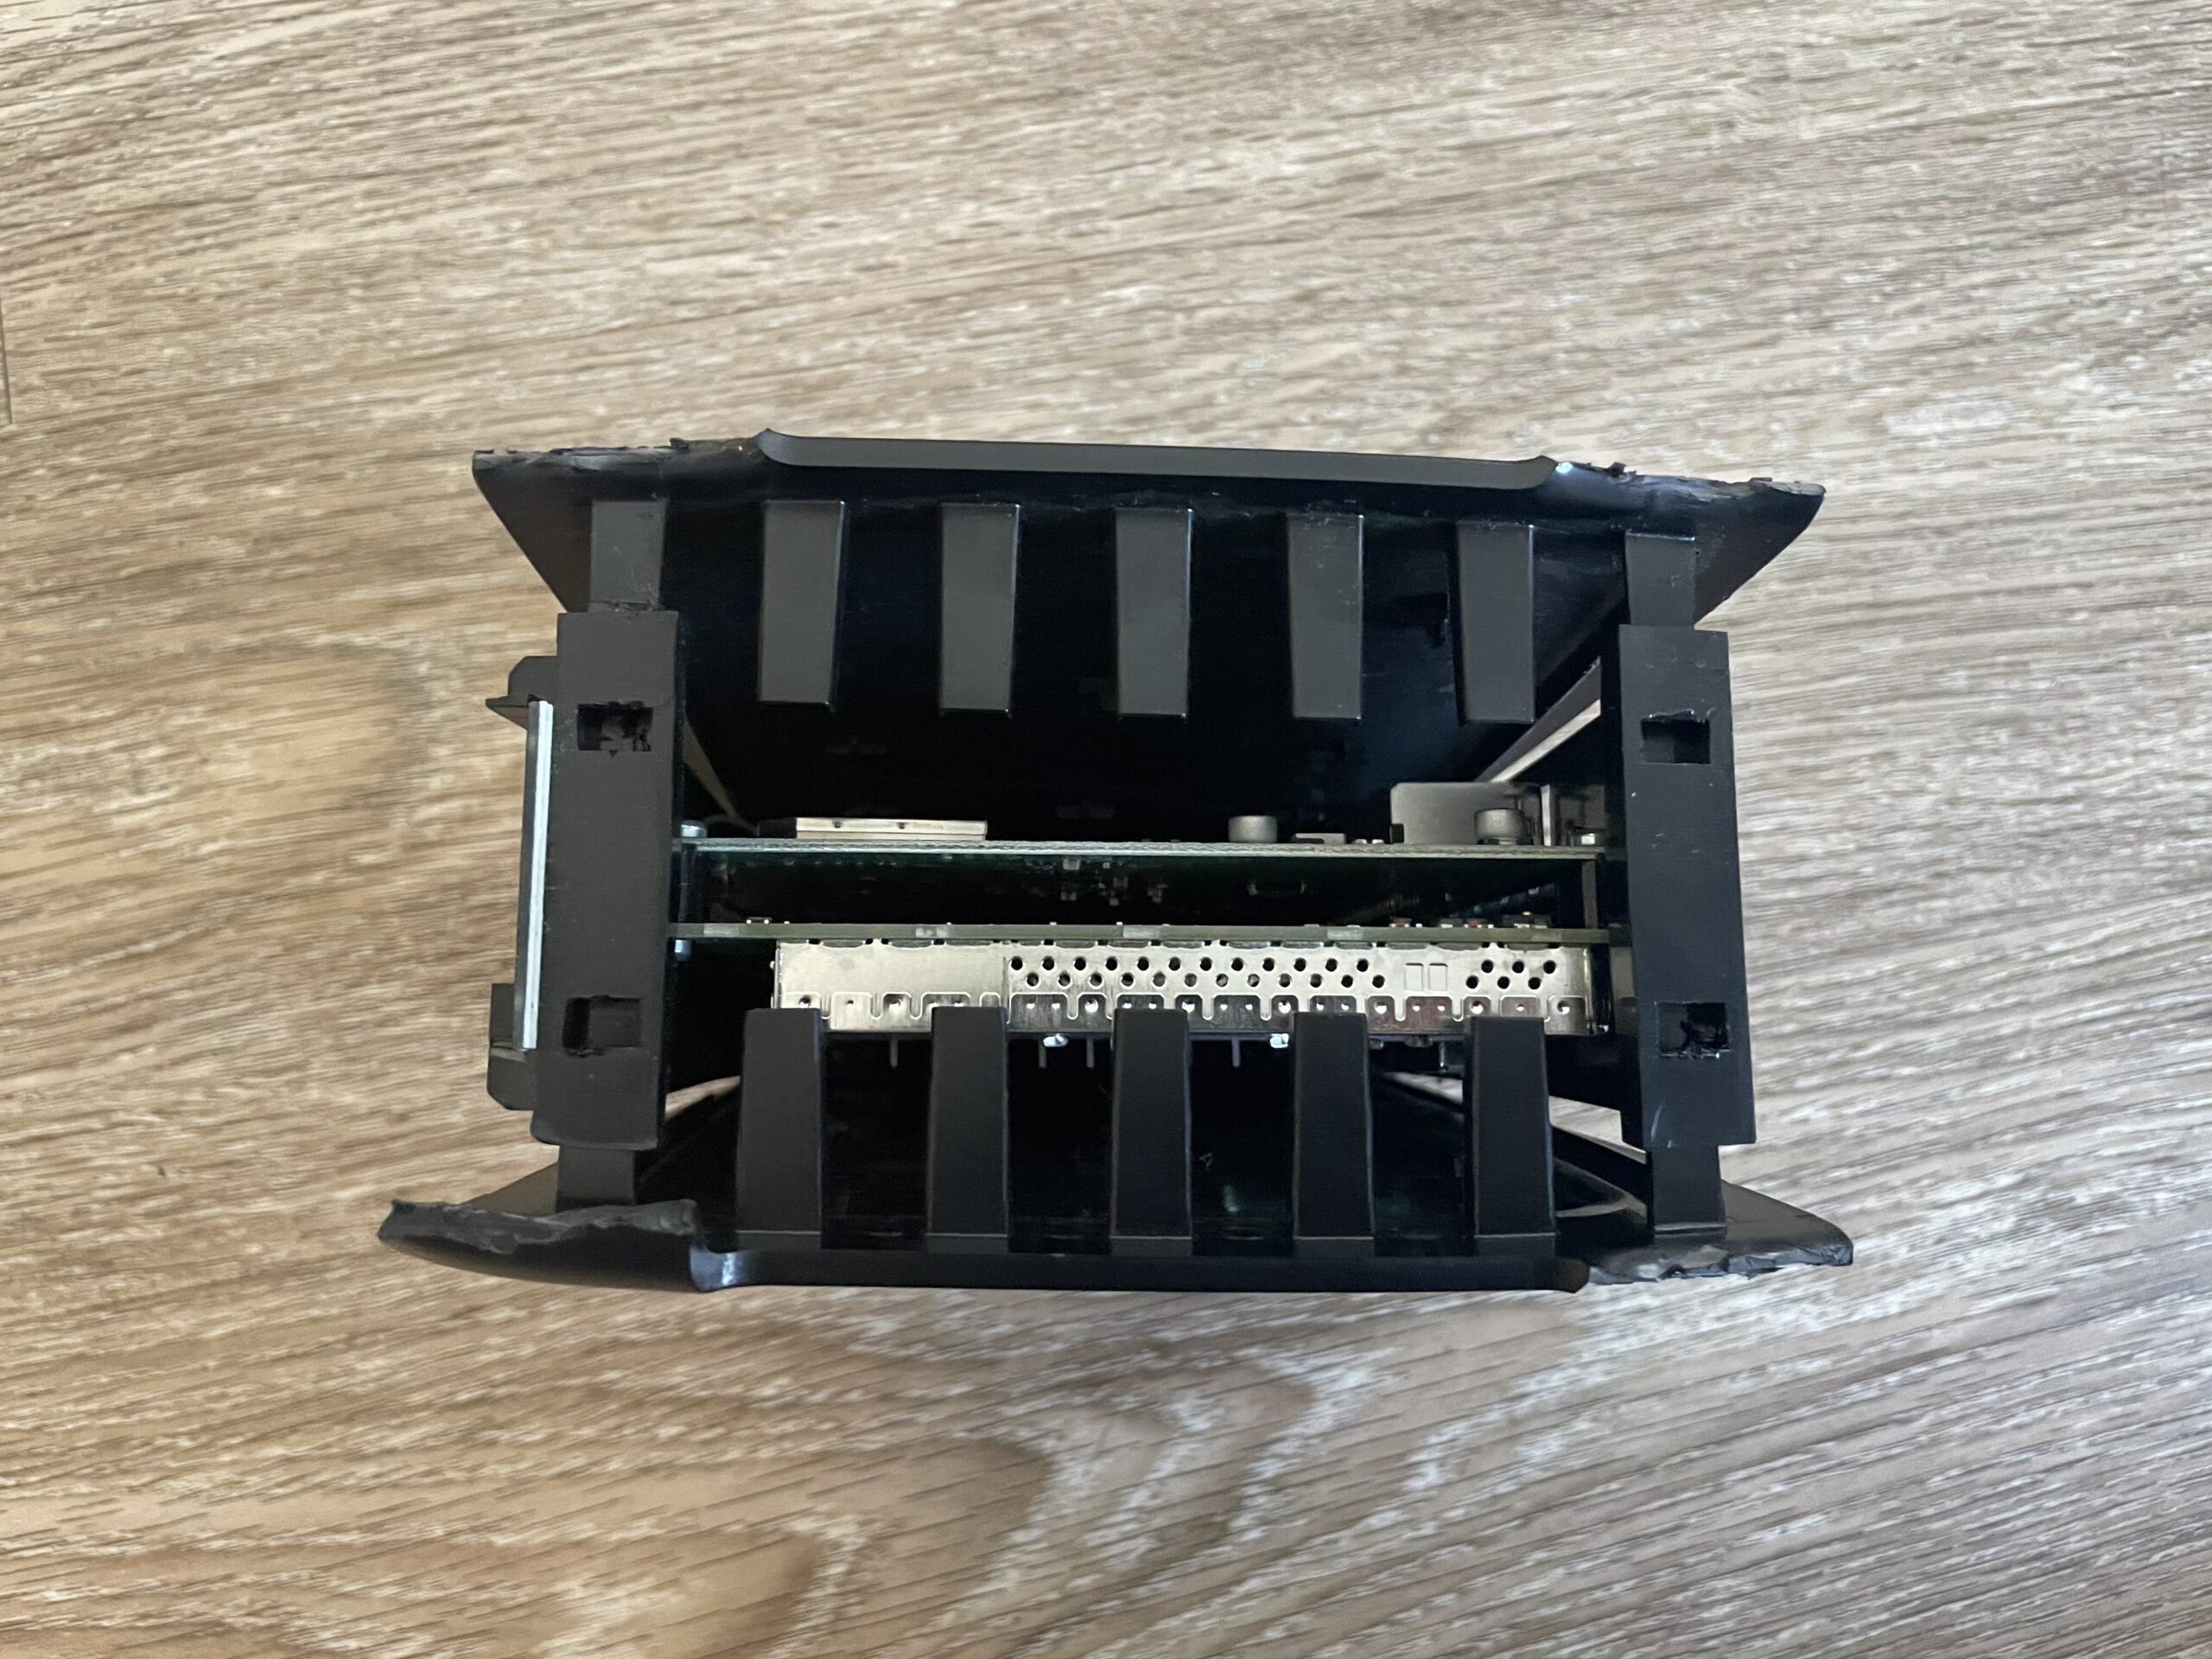
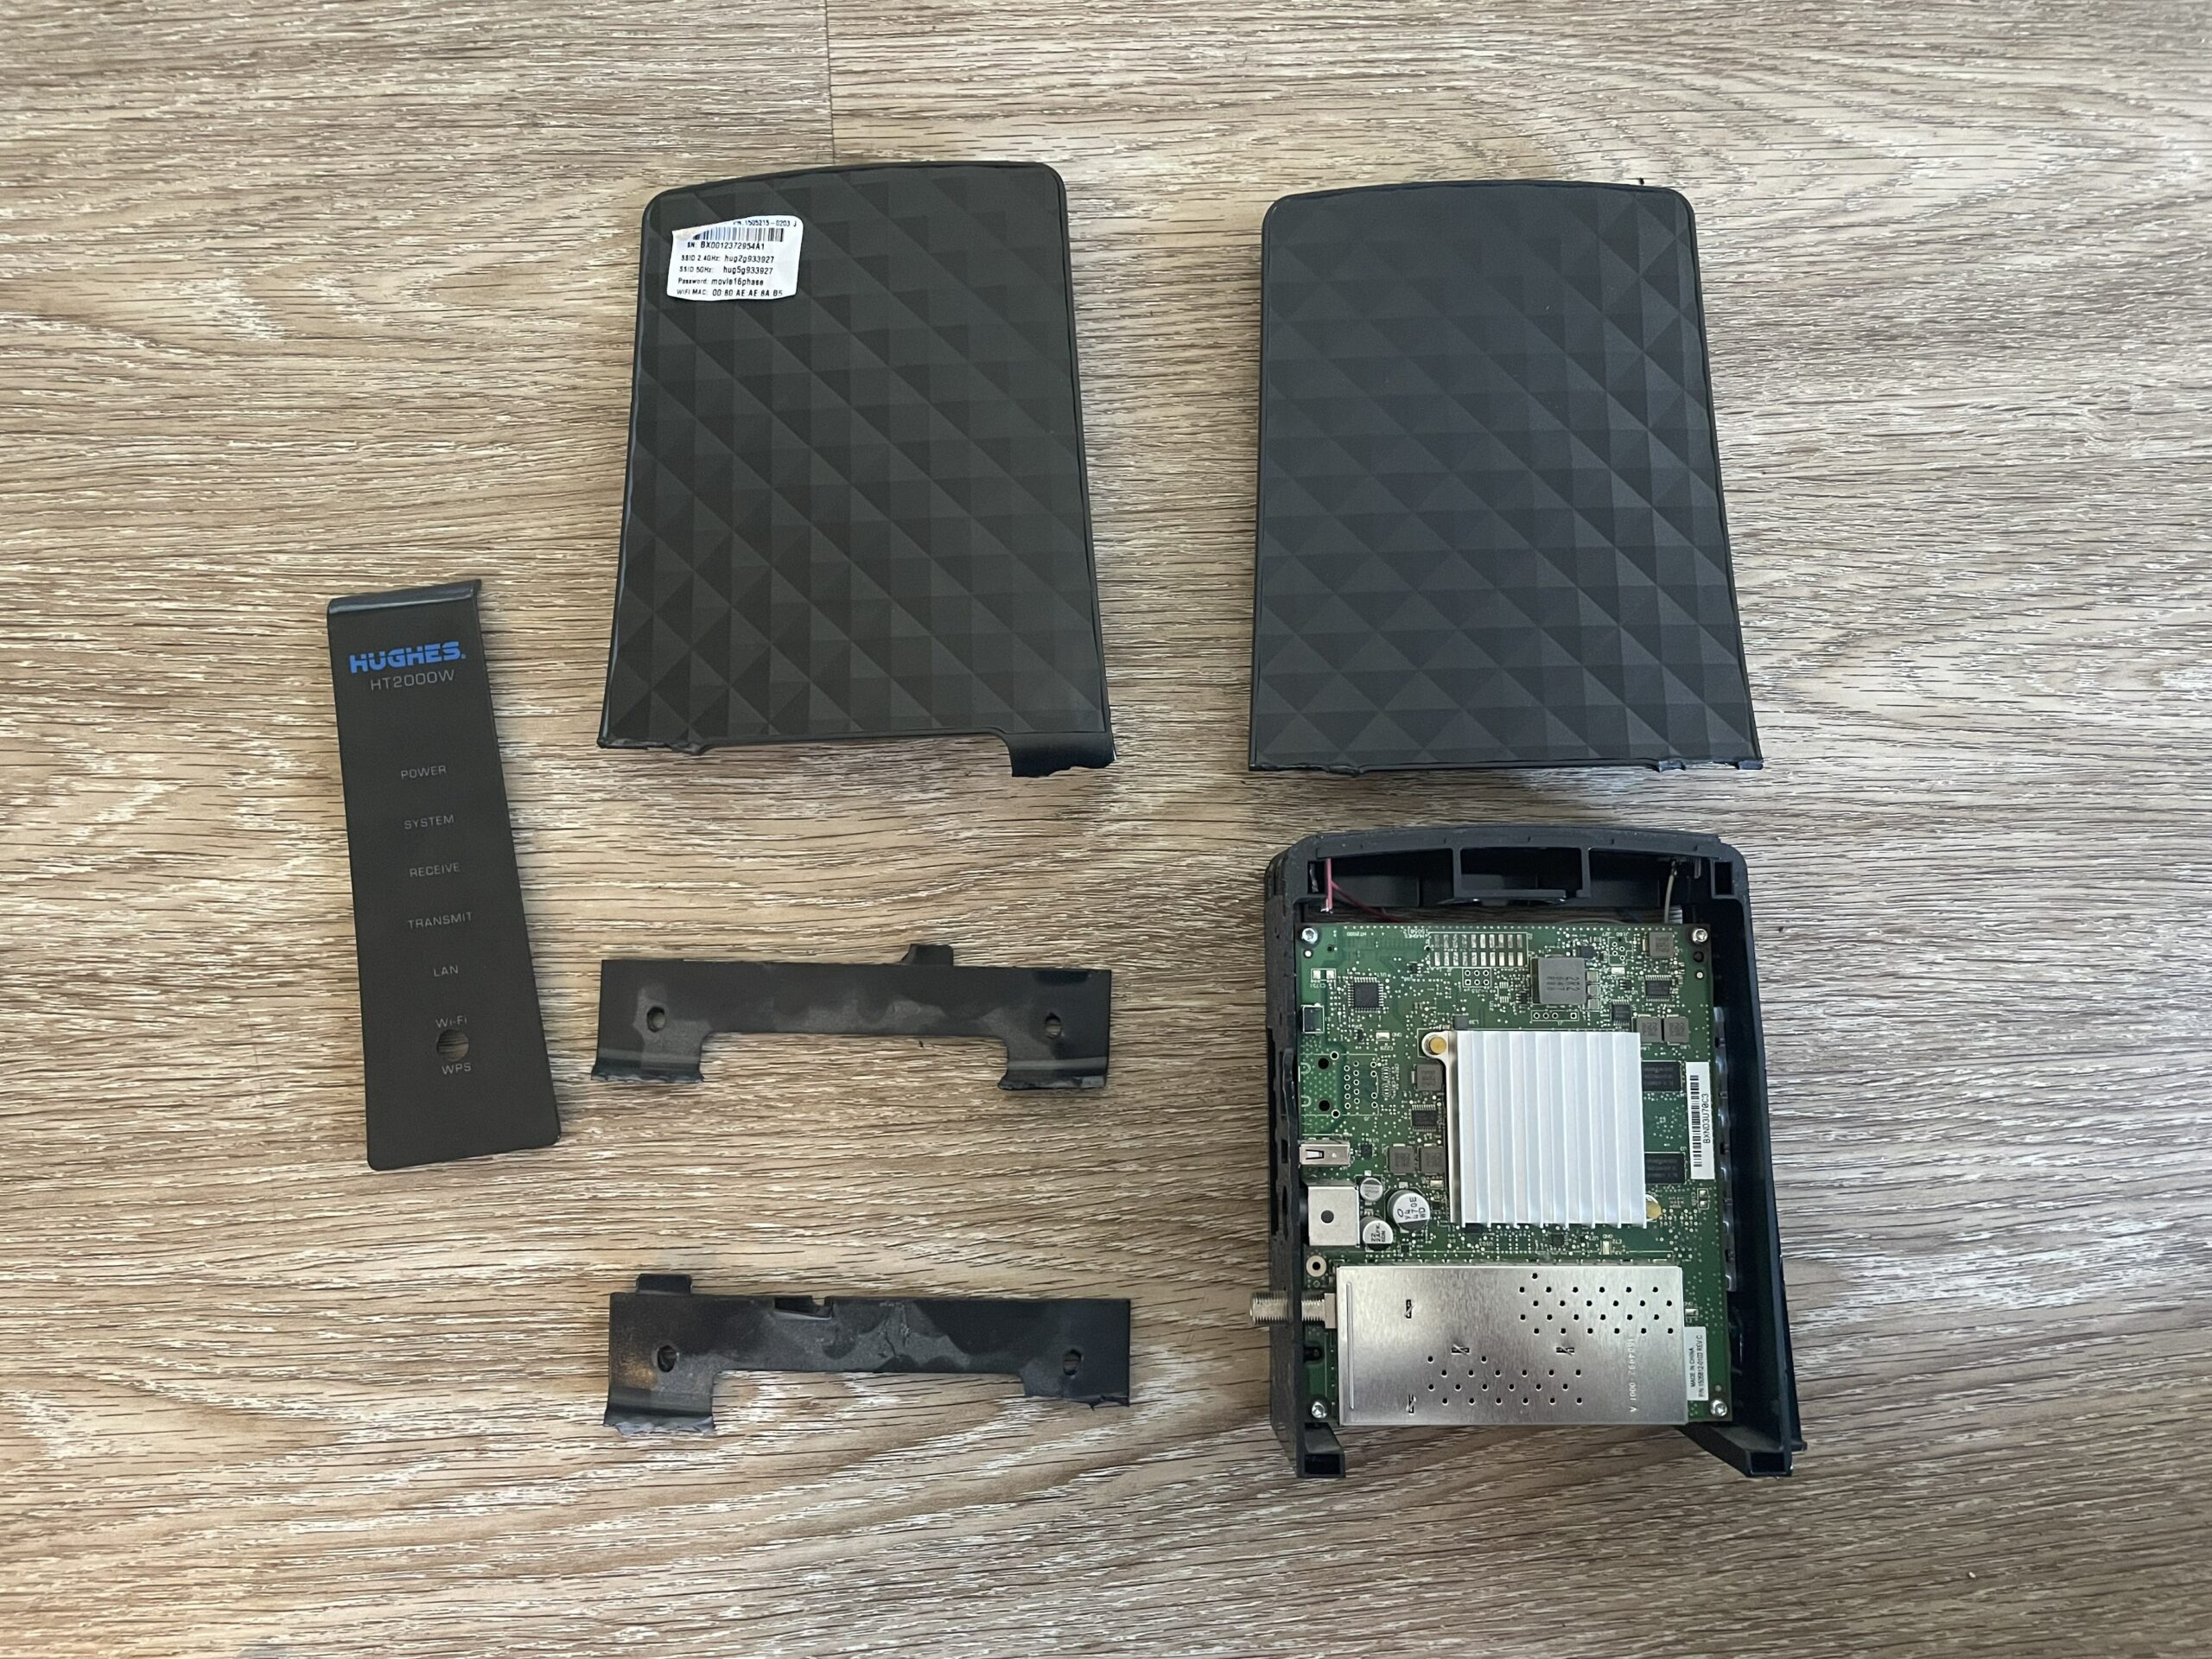
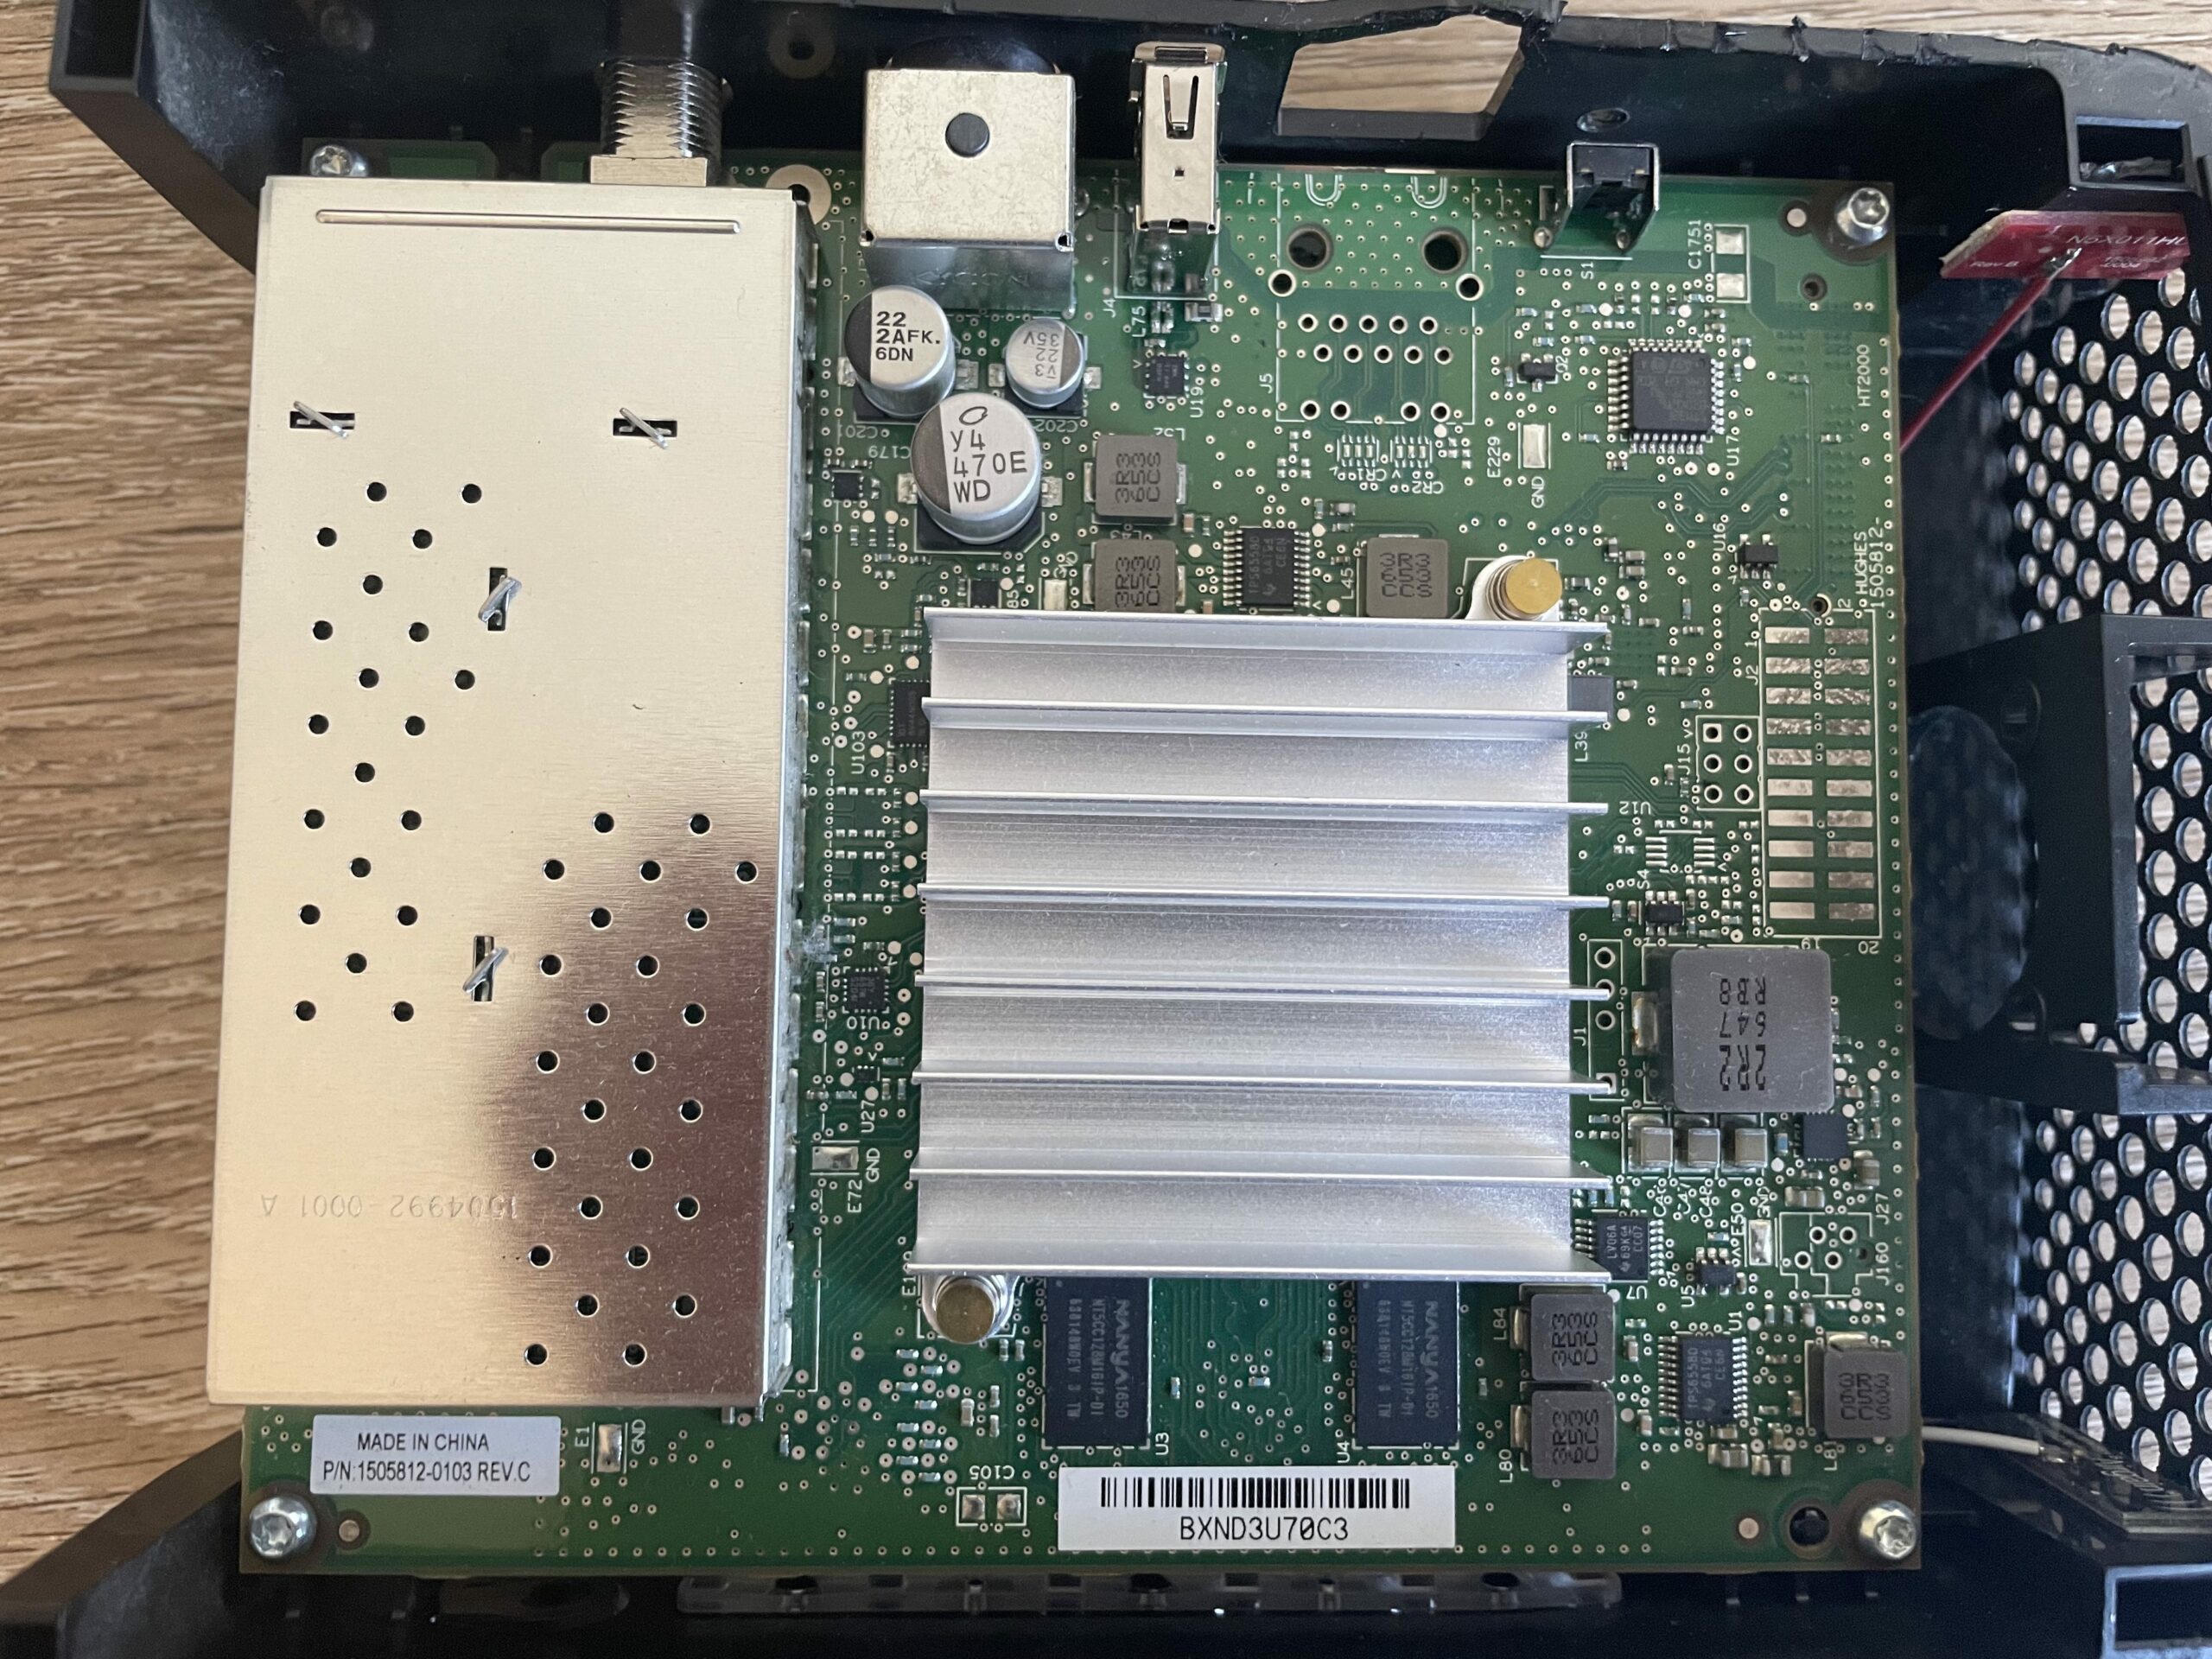
A "cool" feature of this modem is it is actually 2 physical PCBs connected together with something I'm unfamiliar with. Here's an FCC doc showing the pinout of this connector. The modem PCB is identifiable by the coax connector and the big heat sink on the FPGA. This is where all the signal processing happens.
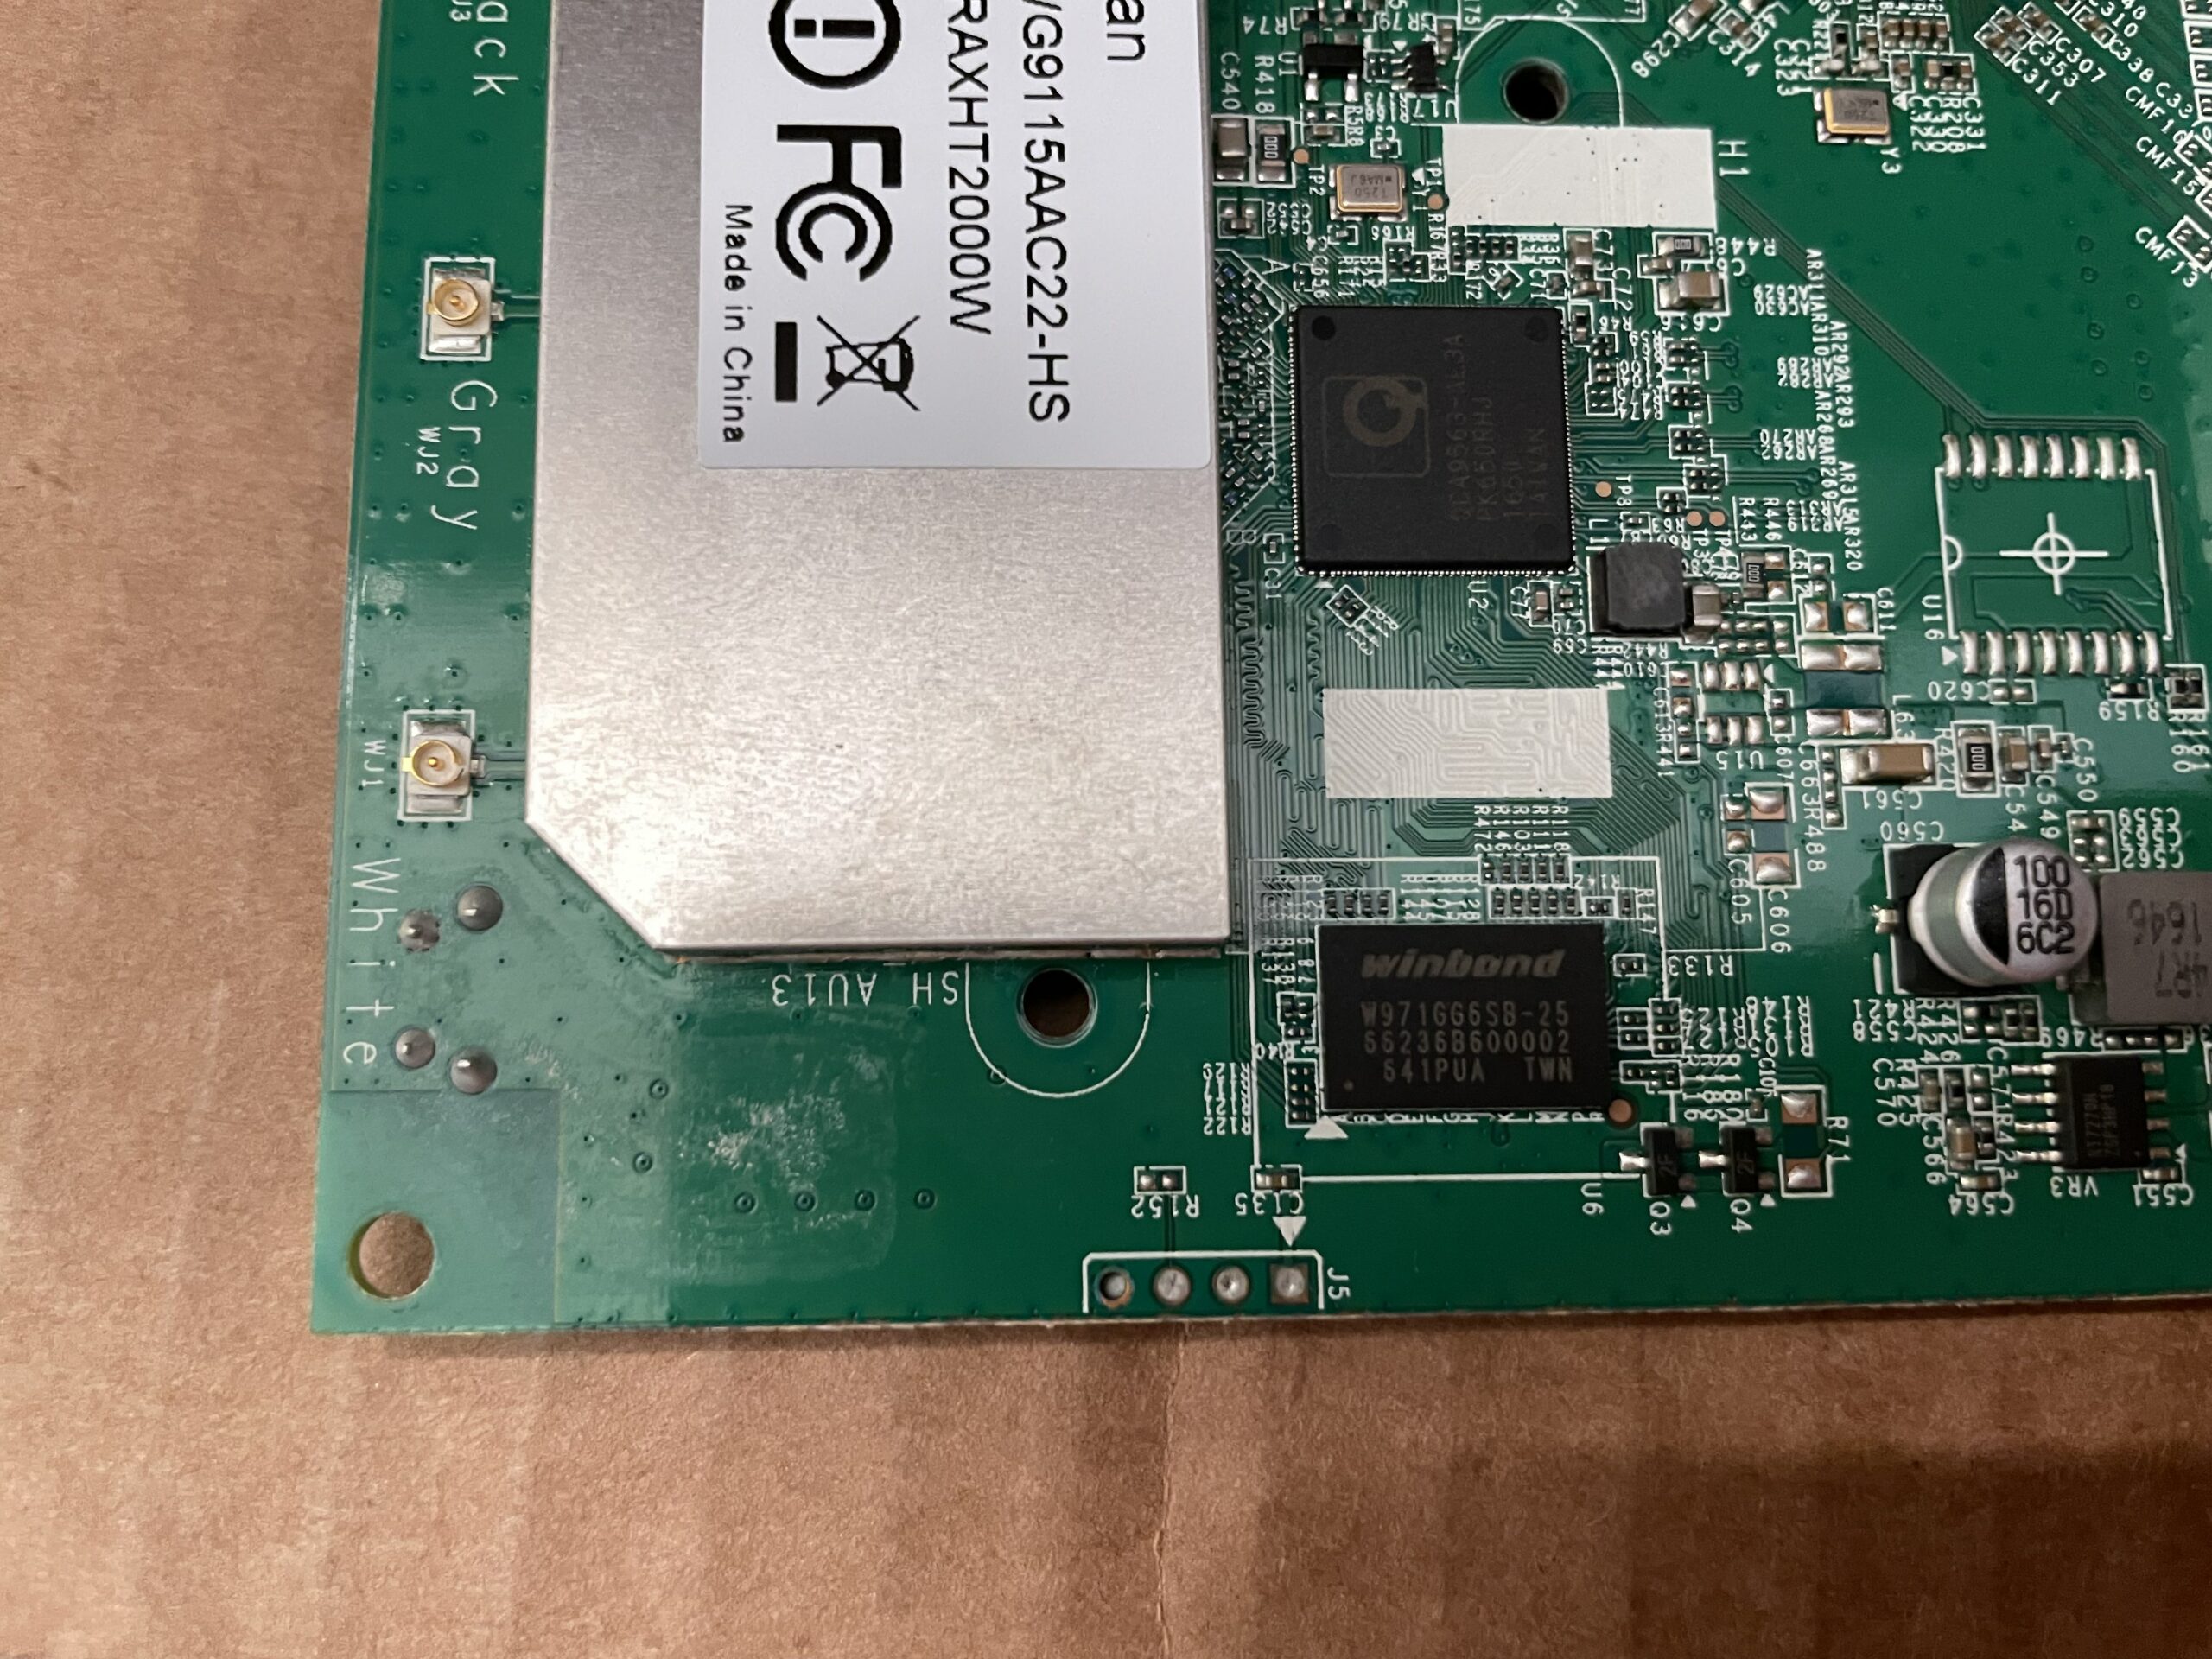
On the back side is the router PCB which is identifiable by the ethernet ports, 3 Atheros chips and 2 RF shields.
 |  |
Here's some close-ups.
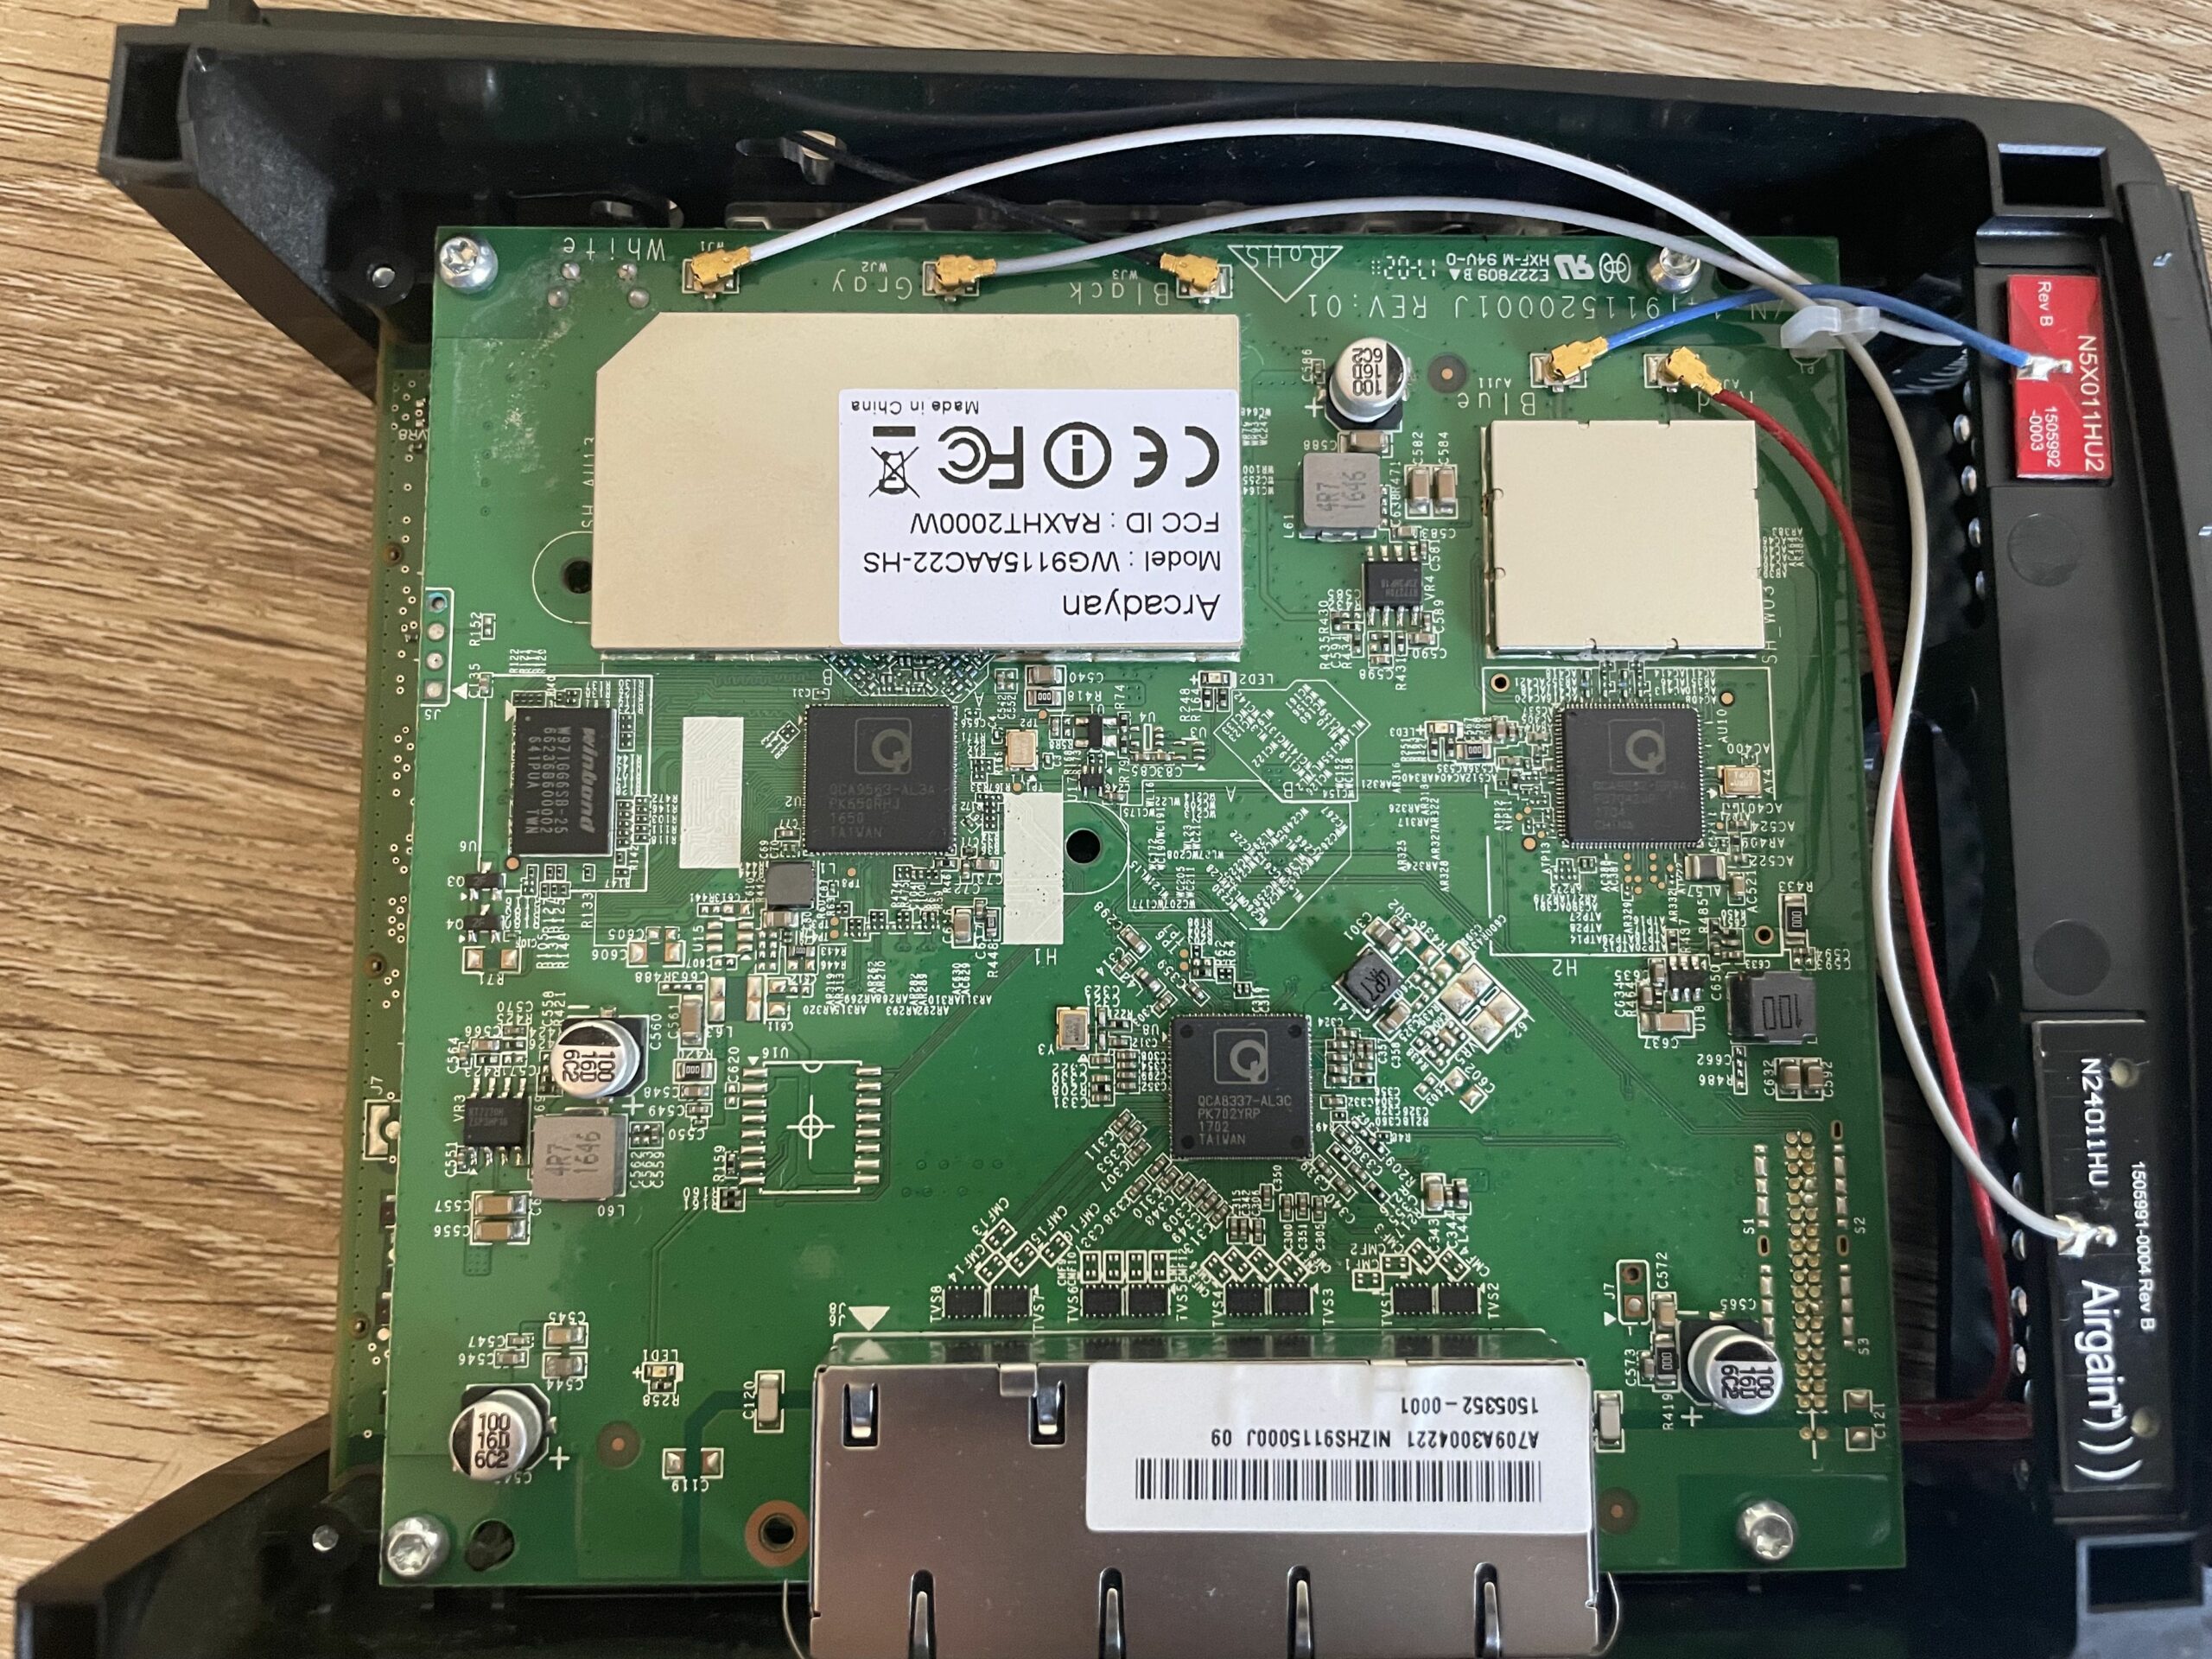 |  |
There's 4 screws on the corners on both the modem and router PCBs holding them to the chassis. Taking off the 4 on the router PCB allows us to expose the back sides of both boards. We'll start with the router board.
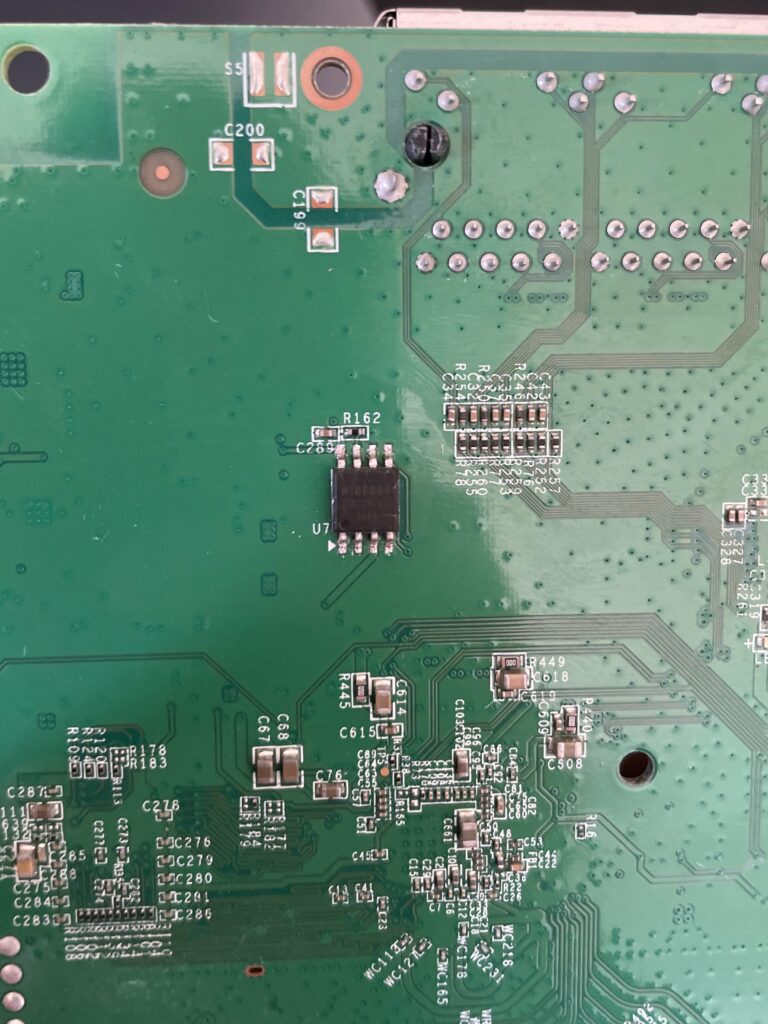
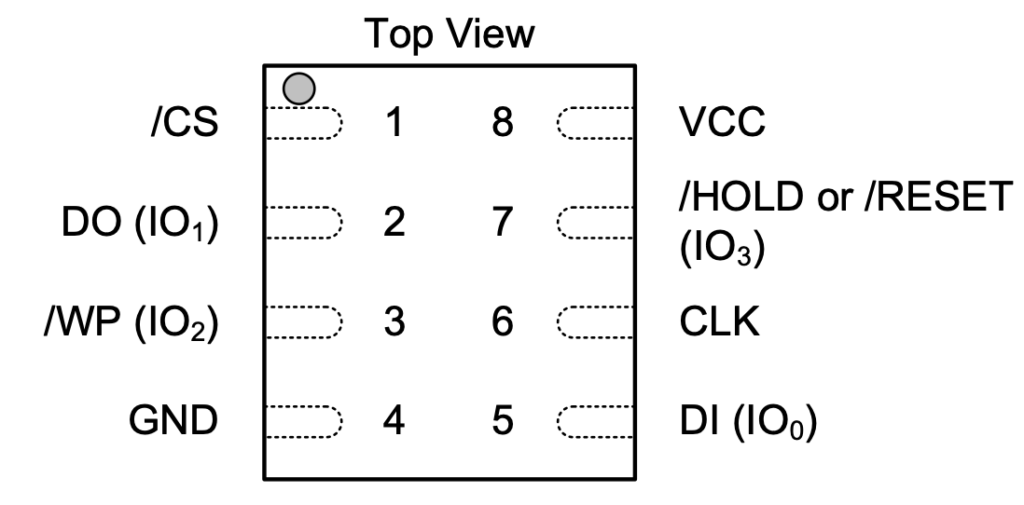
The only thing of interest is the Winbond 25Q128FV serial NOR flash. I did attempt using a SOIC-8 chip clip and my Shikra board to dump the flash, but flashrom had trouble identifying the chip. Initially, I had been using a Raspberry Pi 4 as a 3.3V source to power the chip. After hours of frustration and 0 bits dumped from the chip, I figured the 3.3V header on the pi wasn't supplying enough current. I also powered WP, which is Write Protect and basically makes the chip read-only, and the HOLD pin. Here's the schematic of the chip.
Next, I tried powering the chip with an external power supply, still with no success. Admittedly, I spent far too much time trying to get this to work and my best guess is that something else on the board is preventing me from reading it. In effort to not potentially brick the device by desoldering it, let's try something else.
You may have noticed on the router close-up image above 4 suspicious points below the RF shield. It's a shot in the dark, but let's solder some female jumper cables to them.
 | 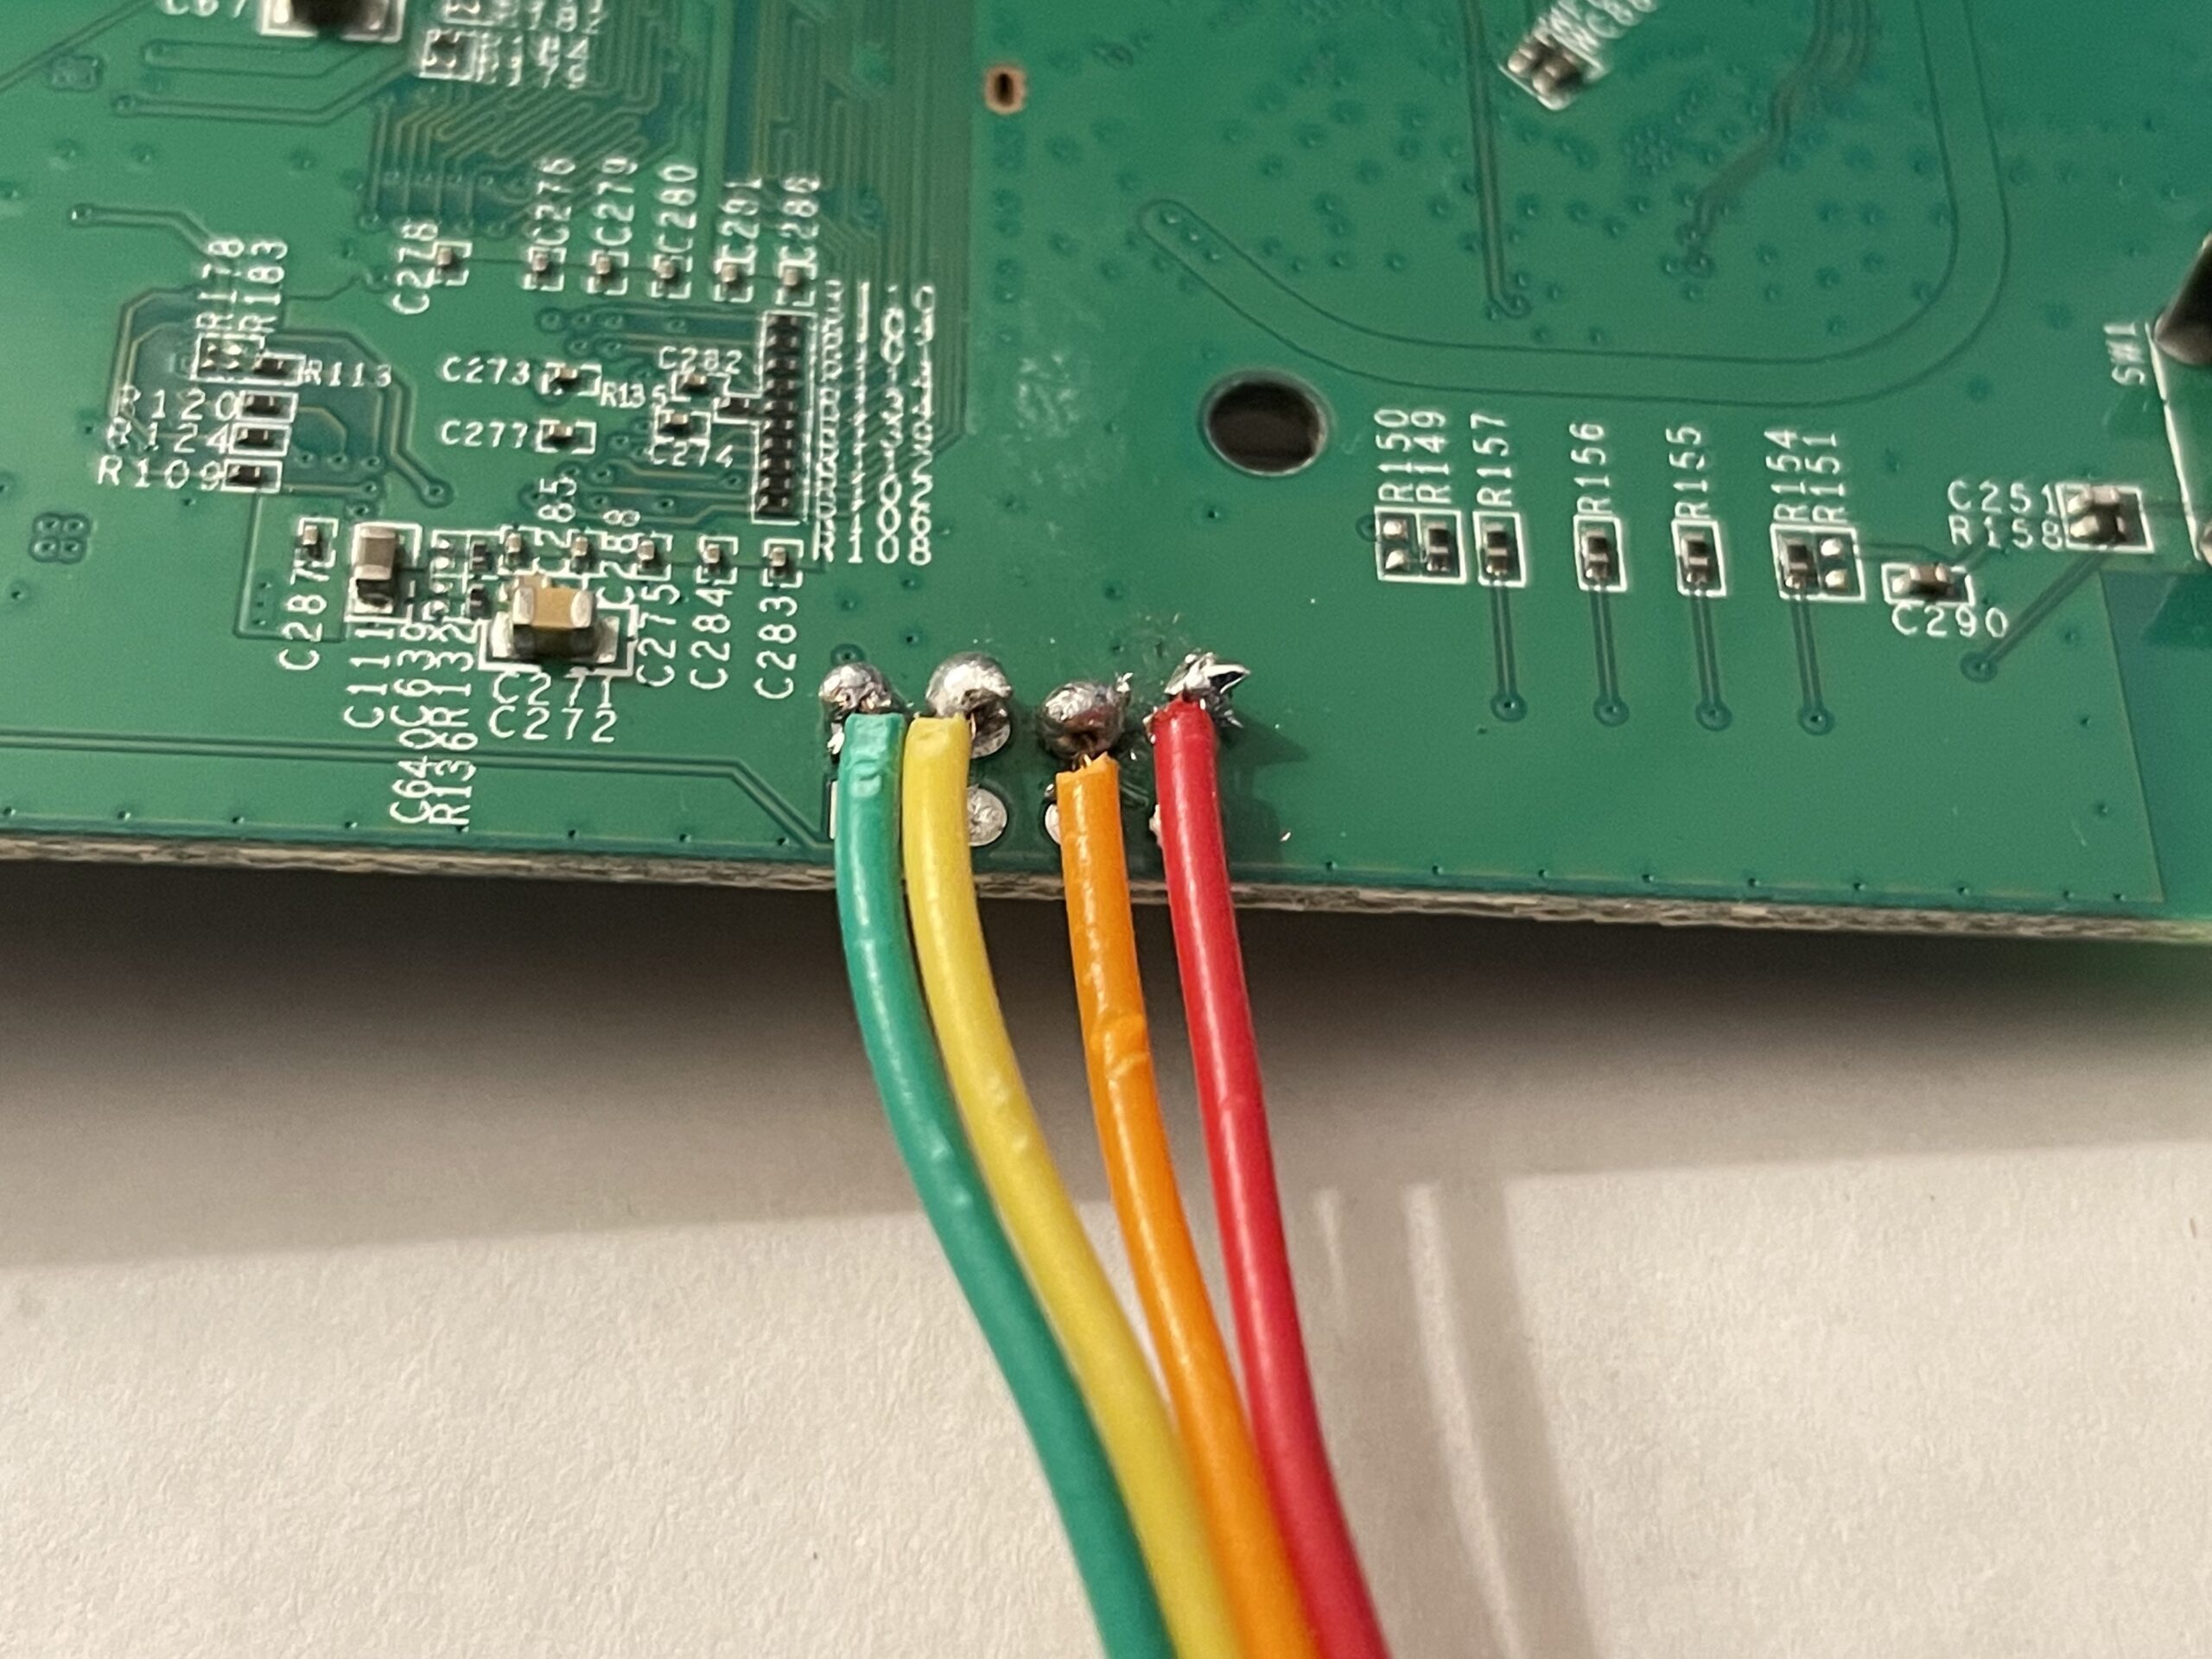 |
You probably guessed by the captions. Yep, this is UART! From the right picture, we will assume left is pin 0 and right is pin 3 (the left picture is inverted).
- Pin 0: VCC
- Pin 1: TX
- Pin 2: RX
- Pin 3: Ground
Booting Up
Here's a paste of the bootlog which I highly recommend checking out.
Looks like the router has U-Boot (surprise!) and runs some variant of OpenWrt. It's likely based on Chaos Calmer based on the kernel version running. U-Boot also reports 10 mtd partitions:
[    0.480000] 0x000000000000-0x000000040000 : "ub"
[    0.490000] 0x000000040000-0x000000050000 : "ub-env"
[    0.490000] 0x000000050000-0x000000400000 : "tiny"
[    0.500000] 0x000000400000-0x000000510000 : "knl-1"
[    0.510000] 0x000000510000-0x000000fb0000 : "root-1"
[    0.510000] 0x000000fb0000-0x000000fc0000 : "board_data"
[    0.520000] 0x000000fc0000-0x000000fd0000 : "seccfg"
[    0.530000] 0x000000fd0000-0x000000fe0000 : "pricfg"
[    0.530000] 0x000000fe0000-0x000000ff0000 : "dev"
[    0.540000] 0x000000ff0000-0x000001000000 : "ART"
Here's what I'm interpreting them as:
- U-Boot
- U-Boot Environment
- Unknown
- Kernel Image
- RootFS
- Board configuration data (factory configs)
- Security configurations - board config (contains /etc/config/.glbcfg)
- Private config - more board config? (contains /etc/config.glbcfg)
- Dev?
- Radio calibration data
Once the router board finished booting, it drops us into an unprotected root shell!
/ # id
uid=0(root) gid=0(root)
/ # ls
bin      etc      overlay  sbin     tmp      var
dev      lib      proc     sys      usr      www
Let's see what else we can find at quick glance. Might be handy to check /etc/shadow to see if there are any hashes we can crack.
/ # cat /etc/shadow
root:$1$wqxmW461$MPspcLun.QAfCT2iDYcSm.:0:0:99999:7:::
daemon:*:0:0:99999:7:::
ftp:*:0:0:99999:7:::
network:*:0:0:99999:7:::
nobody:*:0:0:99999:7:::
Bingo! md5crypt (hashcat mode 500). Before we take a swing at that hash, let's see what else we can find. Inside /etc there's a script that looks to configure telnet which makes use of a built-in management tool dubbed mng_cli. It runs the command mng_cli get ARC_SYS_ADMIN_Password. Let's run it ourselves and see what happens.
/ # mng_cli get ARC_SYS_ADMIN_Password
yan2kwhes!
Okay cool, looks like a password. I wonder...
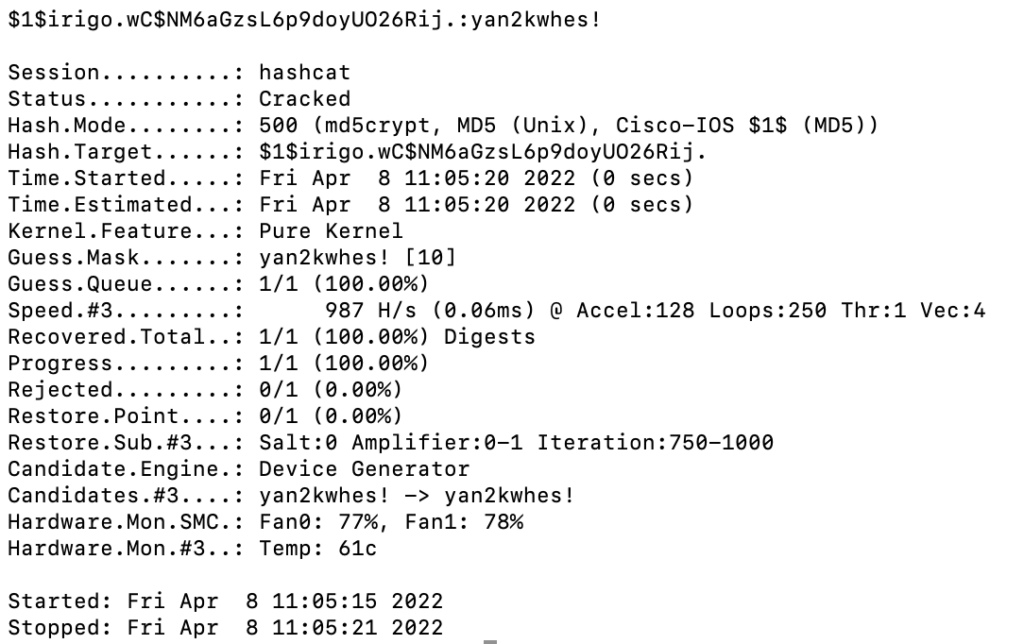
Yep, root password is yan2kwhes!
The Modem
Alright, that's all cool and dandy, but I want to poke at the modem side of things now. Another look at the PCB shows another provocative header just above the heatsink.
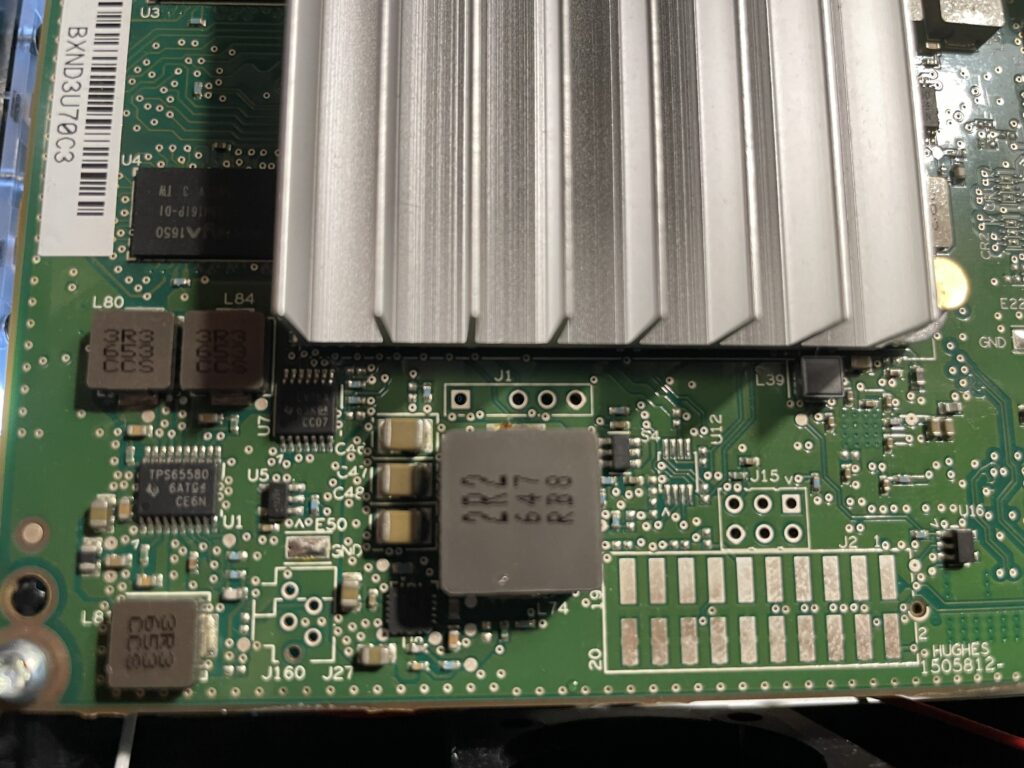
Spoiler alert: it's another UART connector! From this picture, we assume the left pin is 0 and the right pin is 3.
- Pin 0: VCC
- Pin 1: TX
- Pin 2: RX
- Pin 3: GND
Here's the bootlog, which I also highly recommend you open.

Interestingly, HughesNet's most recent fleet of satellites are named Jupiter, like the planet. Thebe is one of four inner moons, and is the second largest.
SPOILER: There's an interesting reference in /cm_data/jupsw/terminal/, the directories thebe, callisto and ganymede are present. Several other scripts reference Ganymede and Callisto, which are the first and second largest moons, respectively. A comment in /vsat/etc/setup.sh says
# 06/22/15  O'Neil      move build-time fakeroot stuff to here
#                       where it is not fake
#                       BTW, this is now Thebe, not Callisto.
So, it looks like Callisto has been rebranded into what is now Thebe. If I had to guess, the HT2000L (MultiPath variant) or the HT2000 (no wireless capabilities) is Ganymede, but I don't know for sure.
Anyways, once the boot process is complete, we aren't dropped into a root shell and the root credentials we found on the router are not working here. After guessing a few possible combinations, I decided I'd be better off exploring other options. Let's reboot the device and see if we can drop into a U-Boot console.

Boom! The modem has a "stop autoboot" countdown, which means we can interrupt the boot process and access the bootloader console. Mkay, now what? U-Boot is very limited in what it can do so we might be a bit stuck here. We can see that there's a kernel image uImage on here.
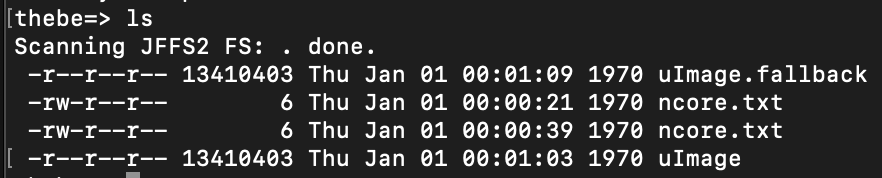
This probably has a user account and hash we can try to crack, but how could we get this off the device? There's no tftp and the ethernet ports aren't connected to the modem anyways, they're on the router so that's out of the question. Insert md, aka memory display. md is a tool built into U-Boot that allows you to print to the console starting from an address up to a number of bytes. Also cool, but we don't know where this kernel image is located in memory. A look at the bootlog shows that right after the autoboot timeout, the kernel is loaded in at address 0x80800000 and it is 13410403 bytes (hex 0xCCA063).
### JFFS2 loading 'ncore.txt' to 0x80800000
Scanning JFFS2 FS:   .   done.
### JFFS2 load complete: 6 bytes loaded to 0x80800000
I'm OK
### JFFS2 loading 'uImage' to 0x80800000
### JFFS2 load complete: 13410403 bytes loaded to 0x80800000
## Booting kernel from Legacy Image at 80800000 ...
   Image Name:   Linux-3.10.53.cge-rt50
   Image Type:   ARM Linux Kernel Image (uncompressed)
   Data Size:    13410305 Bytes = 12.8 MiB
   Load Address: 80008000
   Entry Point:  80008000
   Loading Kernel Image ... OK
So U-Boot knows how to load this into RAM at a particular address, let's do the same. printenv shows us U-Boot environment (for our purpose, boot config) and there's a handful of useful information.
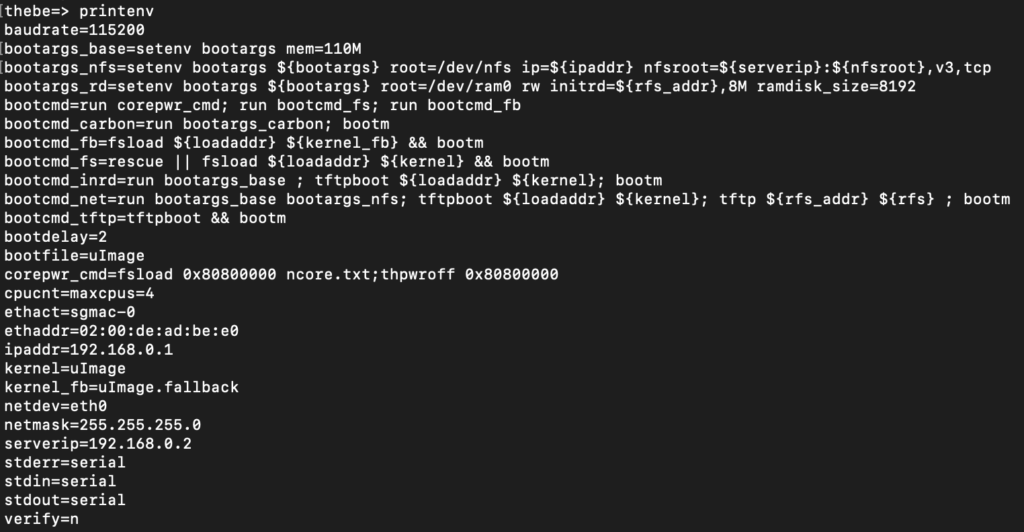
bootcmd is what runs under the hood to boot up the device.
bootcmd=run corepwr_cmd; run bootemd_fs; run bootemd_fb
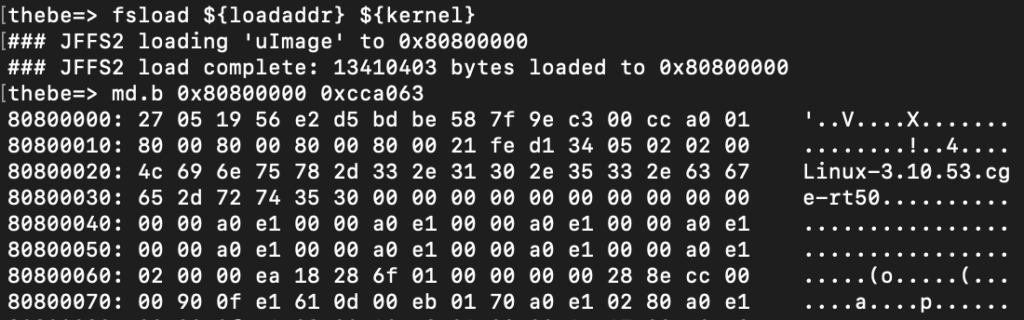
So it runs corepwr_cmd first, which appears to load ncore.txt to 0x80800000. I'm honestly not sure that this is even necessary, but let's run it to ensure we follow the same boot process that the modem does: run corepwr_cmd on the console. The next step bootcmd takes is it runs bootcmd_fs, which loads the kernel into RAM. Looks like what we need! BUT - bootm is going to boot the device, which we don't want right now. So let's just run fsload ${loadaddr} ${kernel} by hand. We can assume that ${loadaddr} is 0x80800000 based on what the bootlog reports and ${kernel} points to uImage.

Success! Now we know that this kernel image is going to be at 0x80800000 and is exactly 0xCCA063 bytes. I'm using Minicom so let's configure it to write out everything to a file. Since the kernel image (root filesystem) is now in RAM, we can dump it using md. On Linux, press your host key + L (usually ctrl or option on macOS) and set Minicom to write out to a file. I named mine uImage.cap. Now we can start dumping the kernel with md.b 0x80800000 0xCCA063. This will start reading from 0x80800000 for 0xCCA063 bytes, again, the size of the kernel image. It will probably take a couple hours as serial is quite slow. The .b tells memory dump to dump in binary.
You'll know its working properly if you see something related to the kernel while the memory is dumping.
When the dump finally completes, open up your cap file in a text editor and remove any leading lines and whitespaces before the first 0x8080000 line. If the last line appears to be cut short, pad it with 00 to match the length of the former line, and then pad the far right column with .s. We can then use uboot-mdb-dump to convert this text file to a raw binary: python3 uboot-mdb-to-image.py < uImage.cap > uImage.bin.
Awesome, now we have a binary of the kernel image! Let's open in with Binwalk: binwalk -eM uImage.bin There's a few compressed archives recursively extracted, and we found the rootfs!
alamarche@dev:~/cpio-root$ ls
bin  boot  dev  etc  fl0  home  init  ip6tables  iptables  lib  linuxrc  media  mnt  mypc  proc  pstore  root  sbin  sys  tmp  usr  var
Using our linux knowledge, we know that /etc/shadow should have a hash for any user accounts.
alamarche@dev:~/cpio-root$ sudo cat etc/shadow
root:yJmLbLQDH1A7A:17022:0:99999:7:::
daemon:*:0:0:99999:7:::
ftp:*:0:0:99999:7:::
network:*:0:0:99999:7:::
nobody:*:0:0:99999:7:::
thebe:BKMVXGc0xaUWM:17022:0:99999:7:::
2 accounts, root and the wonderful thebe! These are descrypt hashes and boy do they have a wonderful flaw. Every descrypt hash is truncated to 8 bytes (8 characters) so at most, our hashcat mask will be ?a?a?a?a?a?a?a?a. This is pretty feasible on modern hardware, and I'm lucky enough to have an RTX 3080 and an RTX 3080 Ti at my disposal. I was able to crack them both in under an hour
root:yJmLbLQDH1A7A:17022:0:99999:7::::bp2skztm
thebe:BKMVXGc0xaUWM:17022:0:9999:7::::thac@gth
Let's reboot the modem now and try to log in.
thebe:/root# whoami
root
Interestingly, iptables don't appear to be used here and I haven't found a compensating firewall (yet).
Getting SSH
Looking at /vsat/etc/setup.sh again highlights these lines:
if [ -f /fl0/englab.dat ] ; then
        /fl0/apps/sshconfig.sh 0.0.0.0 enableroot 0
fi
Apparently, if /fl0/englab.dat exists, SSH is enabled and listening on all interfaces (even WAN???). So, lets create that file and reboot.
# touch /fl0/englab.dat
# reboot -f
Remembering that the modem is at 192.168.0.1, let's connect and try to SSH to that IP. SSH is open!... but the keys don't work. Let's take another dump via U-Boot and see what's going on.
root:JPji6SfLPRjRs:17022:0:99999:7:::
daemon:*:0:0:99999:7:::
ftp:*:0:0:99999:7:::
network:*:0:0:99999:7:::
nobody:*:0:0:99999:7:::
thebe:BKMVXGc0xaUWM:17022:0:99999:7:::
New hashes, still descrypt. Let's crack them!
root:supernova
thebe:thac@gth
Boom, SSH! So it appears that the modem is now in some kind of "Engineering Lab" mode. This should make things a little easier. FWIW, SSH from the modem to the router does work using the root account and the password we found earlier.